This is another figure/doll photography 121 post. I’ve heard from many people as well as seen from many forum posters that they can’t seem to get sharp images for their figure/doll. Some of these people simply didn’t know to use the macro focus mode on their point and shoot camera. However, a lot of them are new users of D-SLRs or have switched from point and shoot digital camera to D-SLRs. In this post, I’d like to explore some of the difference between a point and shoot digital camera and a D-SLR that may cause new and unfamiliar user to get blurry photos. I will also explore a few things on the D-SLR and are specific to D-SLR that may cause blurry photos. I will be using nendoroid, standard PVC figure, as well as doll as my subject. As usual all photos in the post have higher resolution images linked so click on the thumbnail to see better details.
Be aware, this post is image heavy and may take a bit longer to load.
1 – Low Shutter Speed
First thing that typical new user does is to use the automatic exposure setting. Now that certainly takes a lot of work away from new users, it’s also creating a lot of potentials for blurry photos. When shooting figures and dolls, a lot of people shot inside their homes and other dimly lit places. Most people do not have a flash setup like me so they are taking photos using available light. With automatic exposure setting, it tends to in this case use the largest possible aperture and then calculate the shutter speed to allow for proper exposure. This tend to produce a very low shutter speed. For example, it may produce a shutter speed of say 1/10 second. Further more, a lot of people don’t use tripods so they are taking photos by hand holding the camera. All that is a blurry photo disaster waiting to happen.
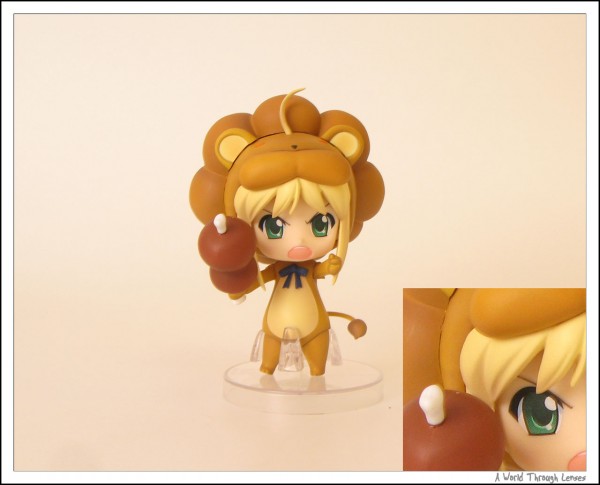
Here’s nendoroid Saber Lion, shot hand held using a point and shoot digital camera (Canon PowerShot G9) using F2.8 @ 1/10 second. I turned on macro mode and I moved the focus selector to cover the face of Saber. Keep in mind, I have very steady hands since I’m use to hand hold a few kilogram of photo gears steady for a full day. Now you have to ignore the yellow color cast on the image. The background is in fact white. But the automatic white balancing on these point and shoot cameras are pretty inaccurate. If you click on the thumbnail to see the higher resolution image, you will see that it’s actually pretty good. There are some blurriness but in general it looks pretty good.
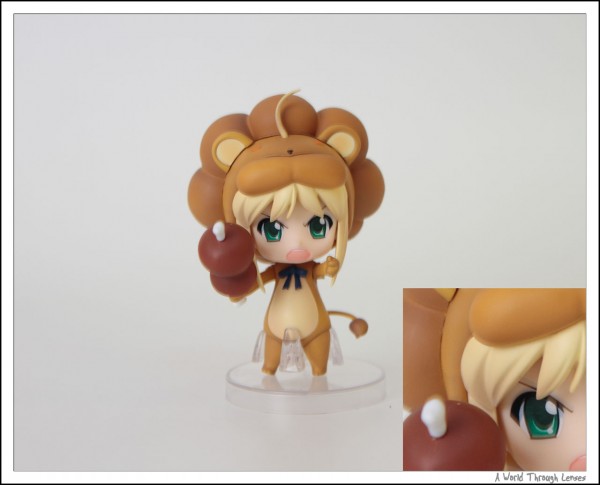
Now how about the same setting on a D-SLR? Here I shot the same subject, under the same lighting using the same setting on a D-SLR (Canon EOS 7D with Sigma 24-70 F2.8) hand held using F2.8 @ 1/10 second. I use a single point auto focus right on Saber’s right eye. You probably can see from the thumbnail already that it’s blurry. And you can certainly see that the shot is very blurry if you are looking at the larger image.
The first reaction to this from most people is that a cheap point and shoot works, while the new D-SLR and lens that costs a few thousand dollar failed. But in fact the shutter speed they are using on the D-SLR is what’s causing the blurriness. So a 1/10 second shutter speed doesn’t work, then what works? Well the rule of thumb in standard 35mm photography for estimating how fast your shutter speed must be for a given focal length is 1/focal length second. That is, if your focal length is 50mm then your shutter speed must be faster than 1/50 second. And if your focal length is 100mm then your shutter speed must be faster than 1/100 second. In this case my focal length is 34mm, on a 1.6x crop camera, the actual 35mm equivalence would be 54.4mm. I decided to use 1/50 second to shoot the next photo.
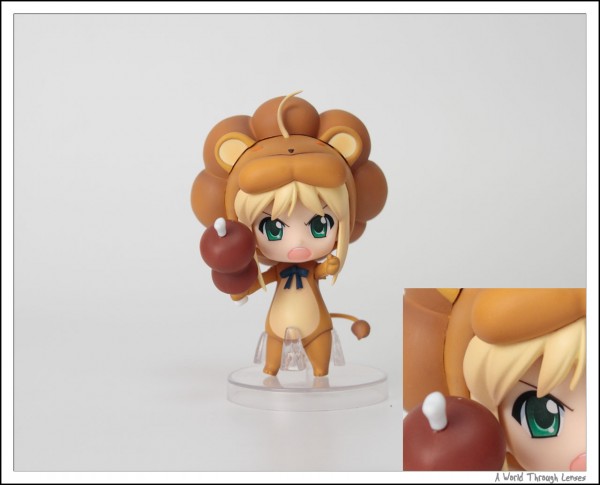
So here it is same D-SLR setup hand held using F2.8 @ 1/50 second. Much better. And if you check out the higher resolution image, you will certainly see that in fact this shot is even sharper than my point and shoot.
Now that’s nendoroid, the scale of the nendoroids are very small. What about typical PVC figures? I choose to perform the similar comparison shots, but using Saber Lily 1/7 PVC as the subject.
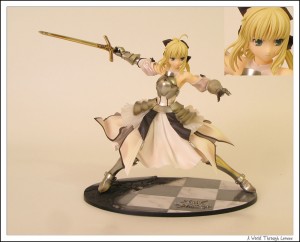
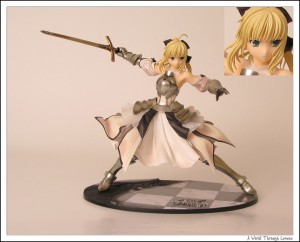
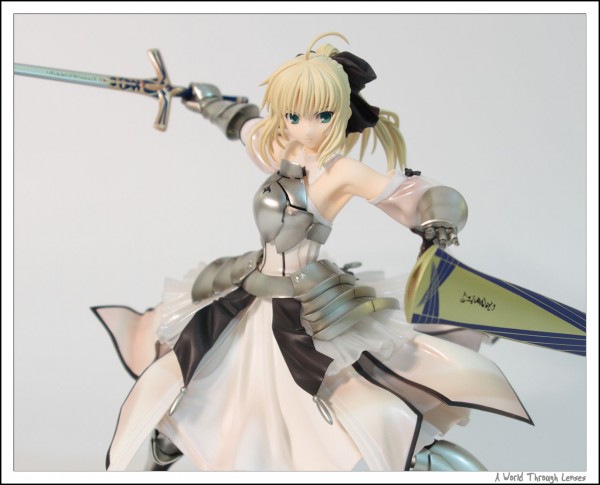
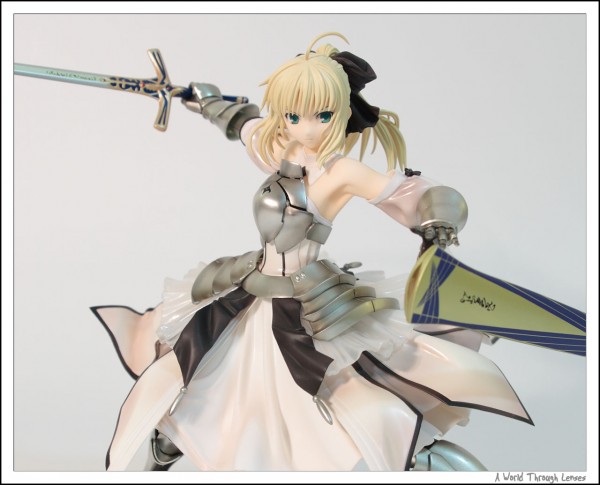
Photo to the left below is made by the same point and shoot (Canon PowerShot G9) hand held using F2.8 @ 1/10 second. Again, I turned on macro mode and I moved the focus selector to cover the face of Saber. I already spotted some blurriness in Saber’s eyes at this setting. So I decide to take the same photo using a faster shutter speed on the point and shoot. The photo to the right below is shot using F2.8 @ 1/50 second. Much better. Yes 1/10 second shutter speed is bad even for a point and shoot.
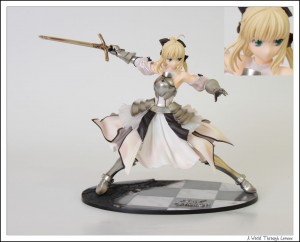
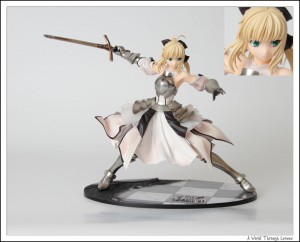
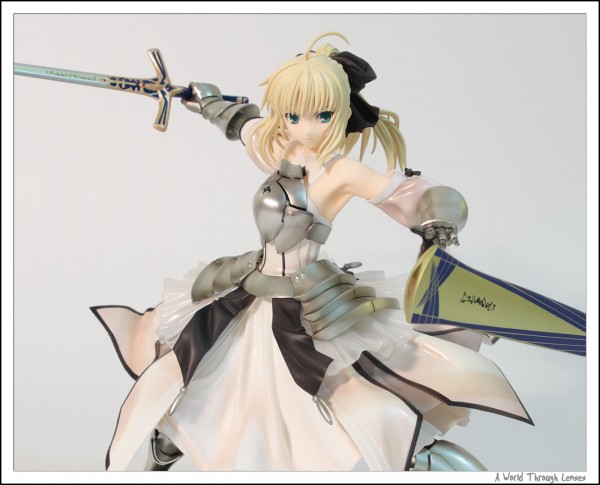
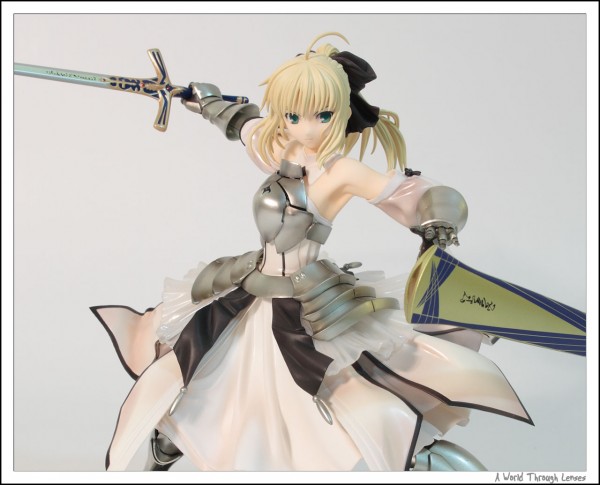
Now the same comparison photo for D-SLR. The photo to the left below is shot using a D-SLR (Canon EOS 7D with Sigma 24-70 F2.8) hand held using F2.8 @ 1/10 second. Again just like in the nendoroid’s case above, the photo is very blurry. The photo to the right below is shot using the same D-SLR hand held using F2.8 @ 1/50 second. The focal length in both case is again 34mm (54.4mm equivalent in 35mm photography).
Again, clearly if you compare the higher resolution image side by side, you can see that 1/10 second just simply don’t cut it. Not on a D-SLR, and probably not on a point and shoot either. So keep in mind of this 1/focal length rule, it is very useful in preventing blurry photos. For me I tend to use much higher shutter speed than just the 1/focal length, in fact in typical figure photography, I tend to use 1/200 second for my flash setup. And if I’m not using my flash setup but rather using available light, I will nearly always use a tripod. So remember, keep your shutter speed high enough, or use a tripod to avoid blurry shots.
2 – Small Depth of Field
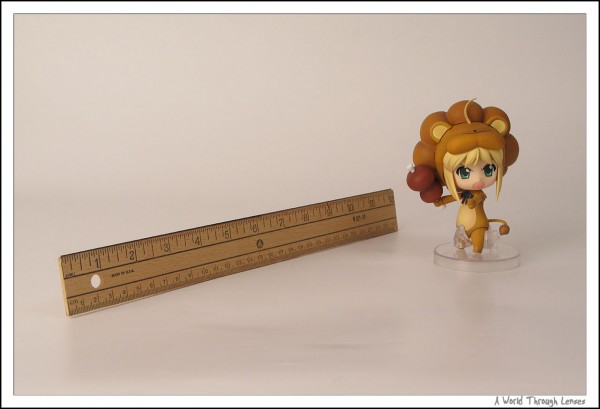
A lot of people think that a small point and shoot is the same as a D-SLR. Just that the D-SLR is bigger and produces better pictures. In fact a lot of things on a small point and shoot camera is very different from a D-SLR. One of them is depth of field. I’m not going to explain depth of field here, so if you want to learn more about depth of field, click on this depth of field wiki page or search for depth of field on Google. Now a small point and shoot camera actually have very large depth of field when compare to a D-SLR. Using this online depth of field calculator, one can easily plug in the numbers and calculate what their depth of field is given the camera, focal length, aperture, and subject distance. One of the reason that the camera needs to be specified is that focal length on cameras does not necessary mean the same thing. My Canon PowerShot G9 has a focal multiplier of 4.73x. While my Canon EOS 7D has a focal multiplier of 1.6x. I did the following calculation for my my Canon PowerShot G9 point and shoot camera: at 11mm (equivalent to 52mm in 35mm photography terms), F3.5 with a subject distance of 25 inch, I have a total depth of field of 5.58 inches. Out of which 2.48 inches is in front of the subject and 3.1 inches is behind the subject.
In the photo below, I placed a ruler at 45 degree from vertical to my my camera’s image plane, and placed nendoroid Saber Lion at around the 6 inch mark. Then I just took the shot with my Canon PowerShot G9 point and shoot with focus set on Saber’s face. If you look at the larger photo, you will find that you can hardly see any blurriness on the ruler.
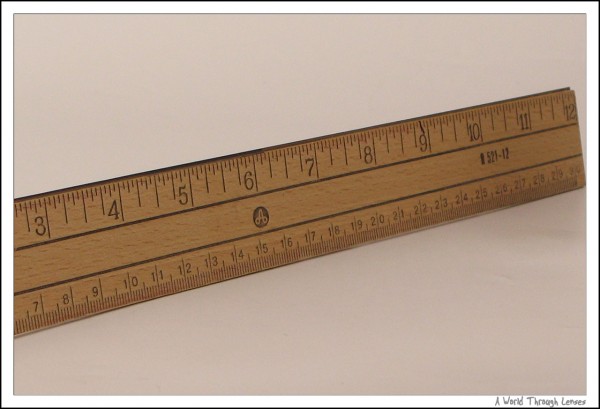
Here’s a little zoomed in image of the ruler. Maybe a little bit blurriness starting at around 11 inch mark on the ruler. Of course being that the ruler is set at 45 degree, the 11 inch marker on the ruler is about 3.5 inches behind the subject and in this case, barely out of the depth of field range.
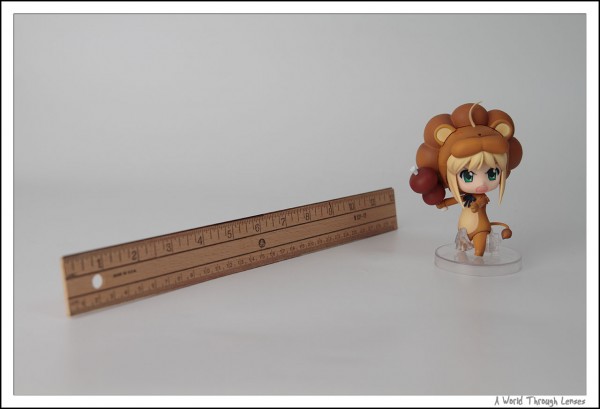
So how about on a D-SLR. Because depth of field is affected by focal length, aperture, and subject distance. I want to make sure all the settings are the same on the D-SLR when I make a comparison shot. Using the same calculator, my Canon EOS 7D at 34mm (equivalent to 54.4mm in 35mm photography terms), F3.5 with a subject distance of 25 inch, I have a total depth of field of 1.76 inches. Out of which 0.85 inch is in front of the subject and 0.91 inch is behind the subject. Yes on the point and shoot I have a total depth of field of 5.58 inches while on the D-SLR the same equivalent focal length, same aperture, same subject distance gives a depth of field that’s more than 3 times smaller.
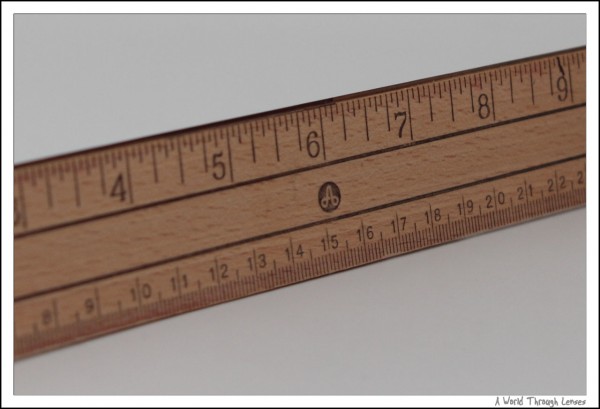
So looking at the zoomed in image of the ruler, the ruler clearly shows blurriness both in front and behind the subject. In front of the subject it started around 5 inch mark on the ruler, which after simple calculation is about 0.71 inch in front of the subject. Behind the subject, the blurriness started around 8.5 inch mark on the ruler, and that’s about 1.8 inches behind the subject. Not exactly what the calculator tells you, but then my setup here are not that precise either.
As you can see that the D-SLR has a much smaller depth of field when compared with a point and shoot camera. So much so that people think D-SLR is broken. But that’s just how the camera is designed to work. In fact it’s the smaller point and shoot camera that’s broken, because it is next to impossible to blur out the background on these point and shoots due to the incredibly large depth of field. So if you are new to D-SLR and/or you just switched from a small point and shoot camera, you need to keep in mind that there is a much smaller depth of field, and that you need to keep your subject within the depth of field for it to be sharp. Subject outside of depth of field will be blurred gradually based on distance away from the point of focus, just like my ruler here.
3 – Focus Point Selection
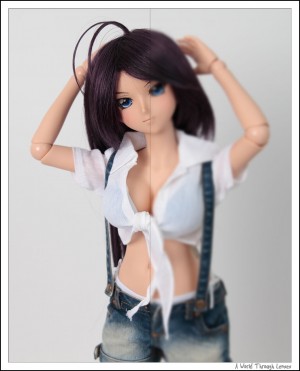
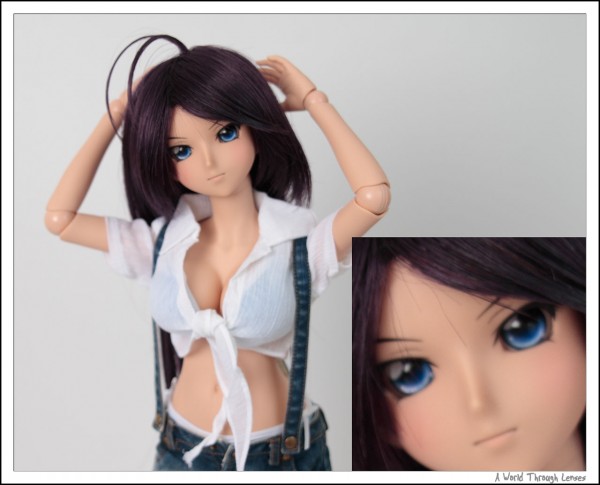
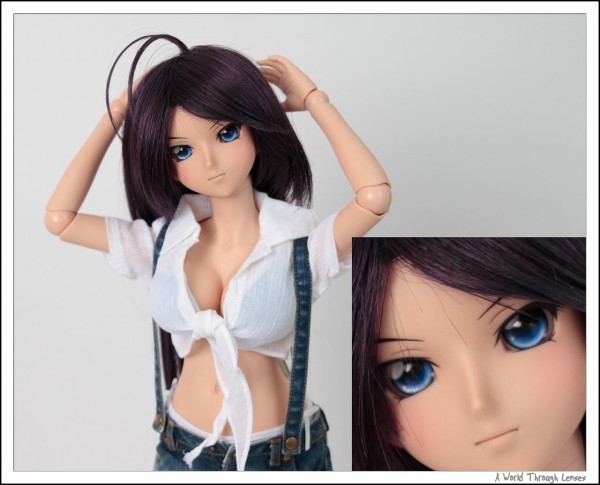
Now D-SLR have automatic focusing mode. New users tends to use a lot of the automatic features on the D-SLR to simplify the photo taking process. However, the automatic focus point selection on D-SLRs proven to be yet another culprit in producing blurry photos. To illustrate the problem I shot the following 5 photos using my D-SLR setup (Canon EOS 7D with Sigma 24-70 F2.8) on a tripod. The shutter is controlled by a release cable to avoid hand vibration to the camera while focusing. All lighting and camera setting are the same with only difference being the focus point selection and focus method. In order to simulate a full auto focus, I manually twist the focus ring to infinite before half press on the shutter release to auto focus then full press on the shutter release to take the photo. In this session, I have enlisted the help of Dollfie Dream Kanu Unchou as the model.
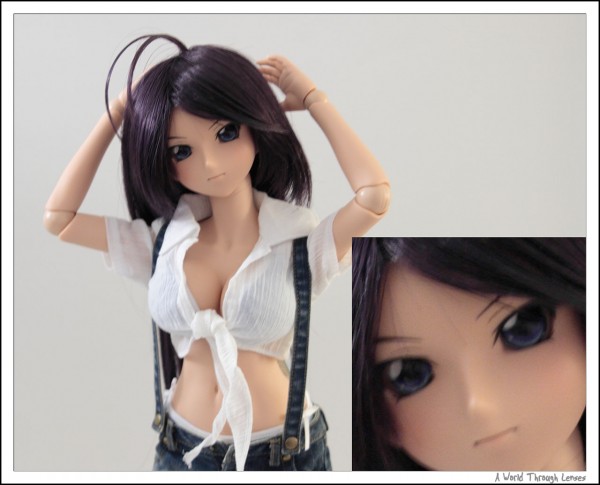
First is the full automatic focus point selection. Canon EOS 7D has 19 focus points and in this mode the camera automatic chooses which one or more focus point(s) to lock on during the auto focus process. It sounded good, but the result proven to be very unpredictable. There are 19 focus points, and every time the camera seems to want to choose a different set of focus point(s) to focus on. And the result is blurry photo as you can see form the zoomed in section.
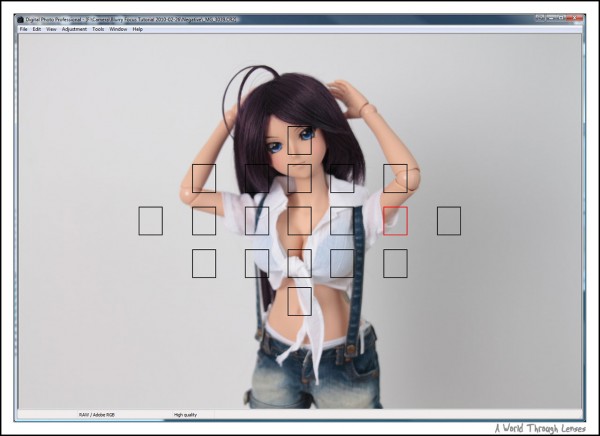
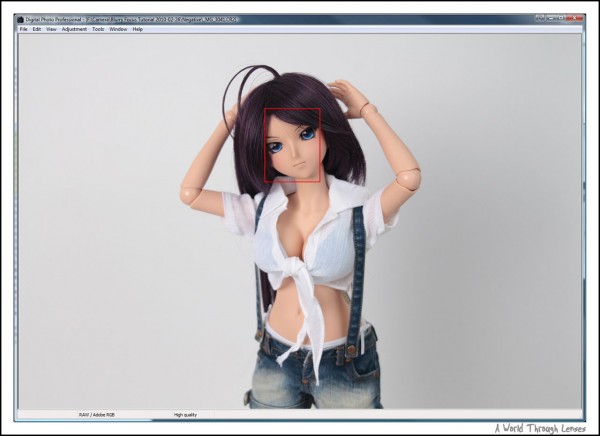
To explain why the photo is so blurry even though the auto focus system thinks it has locked on the target, I open the original photo in Canon’s Digital Photo Professional software and display the active focus point(s). Here the focus points are superimposed over the image frame. The focus point highlight in red is the active one used during the photo taking process. As you can see, for some reason, the auto focus system think that it needs to lock on Kanu’s left upper arm. But under further inspection is seems that the left upper arm is not really in focus either probably due to the lack of contrast, the left elbow is what’s in focus. The lesson here? Never use automatic focus point selection. It’s probably one of the worst thing you can do.
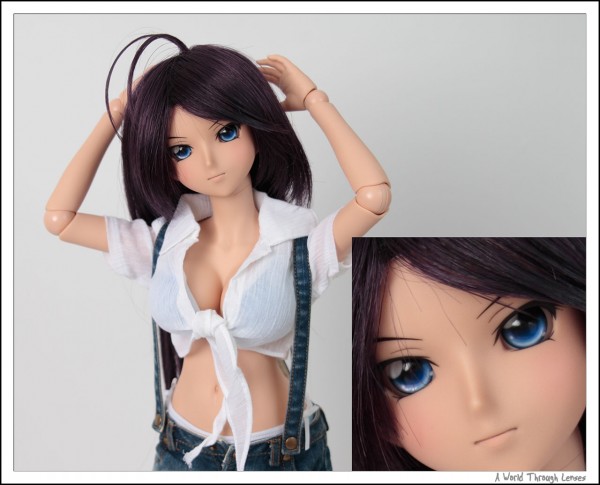
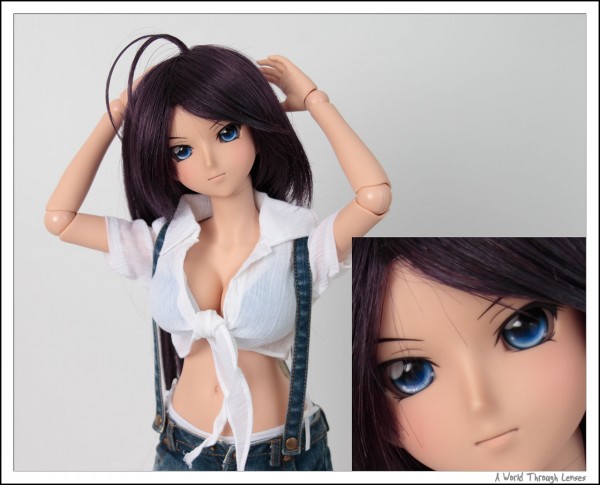
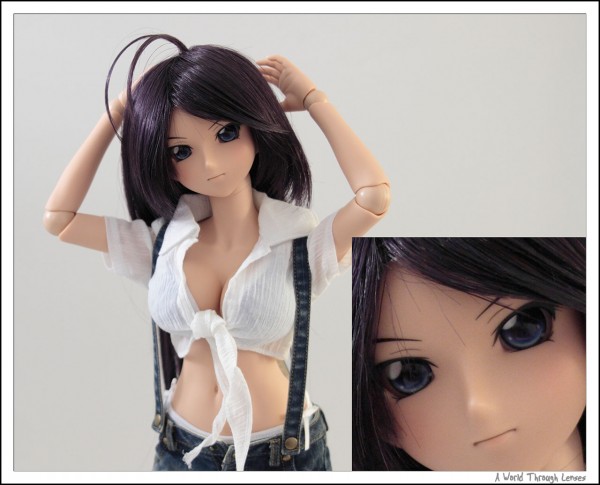
For this photo, I changed the setting to single point auto focus. Using Canon EOS 7D’s 19 focus points, I selected a focus point that’s right on Kanu’s left eye. This way I know exactly where my focus point is and I don’t have to let the camera guess where the focus point needs to be, which it tends to guess wrong anyway. The result is simply superb. Look at the zoomed in section and you can see that the eye is perfectly sharp with great details. Exactly what I wanted in this kind of photographs.
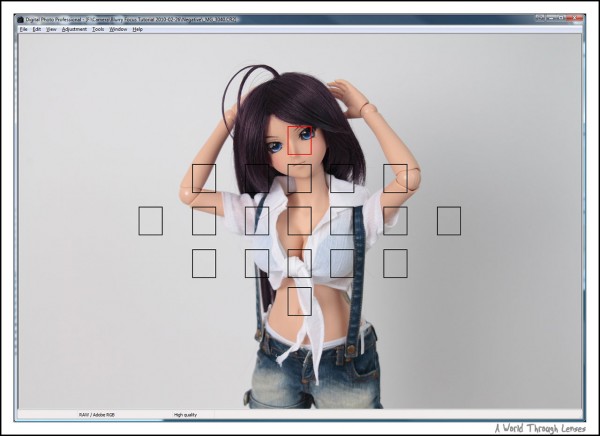
Checking the focus point in Digital Photo Professional software shows that the focus point is exactly where I want it to be. This is how you should focus on your subject most of the time if you are shooting figures or dolls. Yes there are the cases that none of the auto focus point is exactly covering where you want focus. In those cases, you want to pick one of the nearest one, then turn the camera a bit so it is point on the area you want to focus on. Half press the shutter button to focus, then move back and full press to take the picture. The half press to focus, recompose, and then full press to take picture is a common practice in D-SLR photography. As long as you keep the camera distance to the subject the same, it should still give you the correct focusing result.
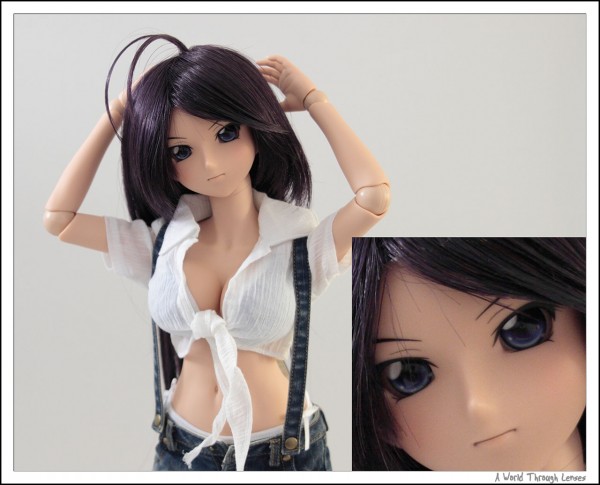
Nowadays, new D-SLRs all have what’s called the live view mode. In the live view mode the mirror is flipped up and the rear LCD displays the image to be captured, a bit like the point and shoot cameras. So here I shot the following photo using the live view mode. In live view mode, there’s no focus point to select. Instead there’s a large focus rectangle that you can move around for auto focus purpose. The focus mechanism in live view is totally different from your regular auto focus system. So I need to show you how to focus in live view. I use the cursor to move the live view focus rectangle to cover Kanu’s face, then half press to lock on focus and full press to take the photo. The result is acceptably in focus. Because the focus rectangle is big, I cannot tell it to focus just on the left eye alone. And so the eyes are slightly off focus and not as sharp when compared with my single point auto focus photo above.
Loading the photo into Digital Photo Professional to check the focus. As you can see the focus rectangle is very large, covering the Kanu’s face entirely. This may lead to blurry photos when very precise focus point selection is required. I tend to be very picky and want very precise focus point selections. For the average user, however, the live view focus rectangle does a good enough job.
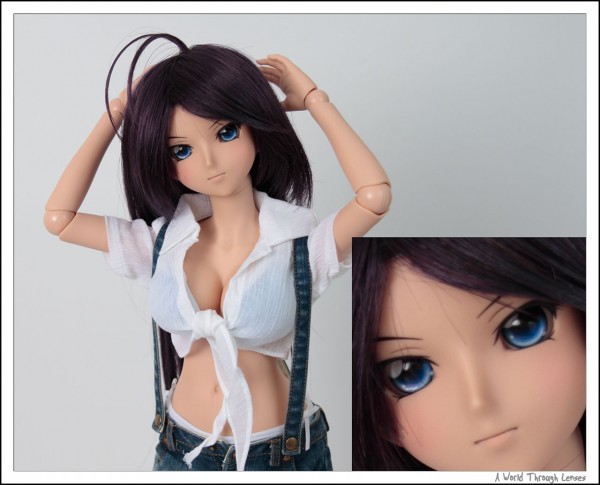
Now this is the last method that I use to focus. This is not auto focus but rather manual focus. I switched my lens to manual focus mode. In live view mode there are zoom options on my Canon EOS 7D and I can zoom to 5x or 10x views. In this case I zoomed to 10x view and moved the view port around to look at Kanu’s face. At 10x zoom, I rotated my focus ring manually and by looking at the live view LCD, I determine where the best focus position is by looking at when Kanu’s eyes are the sharpest. Then I simply click the shutter and took the picture. The result is nice and sharp, exactly what I saw on my live view LCD. It’s possibly even better than the single point auto focus but probably not visible at this resolution.
In conclusion, on D-SLRs don’t use automatic focus point selection because it will produce blurry photos when it guesses the wrong focus point to use. In my test, I tried the auto focus point select many times in a row. And the result is, two time the focus point was on elbow, two times it was on two different part of the chest, one time it was on the shoulder and three time it was on the face/eye. Three out of eight shots that it has guessed the focus point correctly, that’s a pretty low percentage. Now why it kept on choosing these odd points? Well Canon’s automatic focus point selection tends to lock on the closest subject. And in this particular way that I posed Kanu, chest, elbow are both much closer to the camera than the face. So no wonder they became the primary focus target. So remember, use single point auto focus point selection and choose exactly where you want to focus.
4 – Low Light Focusing
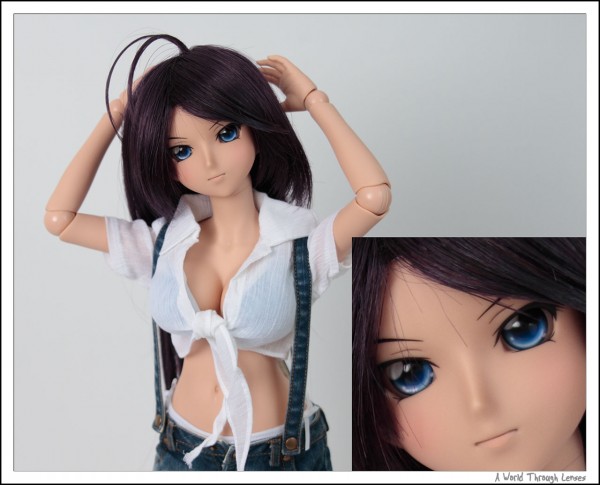
When you are shooting in low light conditions, the amount of contrast between subjects are much lower, the automatic focusing system might not be able to lock the focus on the actual subject that well. For example in the following photo, I’m using my flash setup to take the photos in a dark room. When the camera is focusing there’s very little available light on Kanu. But of course when the shutter button is fully pressed, the flash fires to properly expose the picture. Using this setup I can test out the low light automatic focusing on a bright photo. I’m using single point auto focus and the result is below. Pretty good, but if you look at the larger image, you can see that the eyes are slightly blurry. Obviously the automatic focusing system didn’t work nearly as well as when the subject is a bit better lit.
Now there are a few ways you can solve this issue. First way is that if you are using a studio strobe, then most strobes has what’s called a modeling light. It’s basically a hot light that’s turned off when the strobe is firing but on when the strobe is not firing. Modeling lights can provide some light on the subject so that the subject is not so dark and hard to focus on. Now obviously, unlike me, most people will not have studio strobes at home. So the second solution, is to point a flash light right where you want to focus on when you half press the shutter button to focus. The flash light will light up the subject in the dark and allow your camera to provide an accurate focus lock. Then turn off the flash light or aim it outside of your frame and full press the shutter button to take the photo. Of course it can only be done by a single person if your camera is on a tripod. If you do not have a tripod then you probably will have to get someone else to do it for you. But the result is just as good as modeling lights. I didn’t take any photo in those two scenarios because they will basically be the same as my single point auto focus photo example up above in the Focus Point Selection section.
There is another way to focus in low light. Which is to manual focus in live view mode. Live view LCD is actually very bright and live view adjust the exposure to allow you to see the subject well even in low light. You simply set your lens to manual focus, switch to live view and zoom in at 10x view for example. Now look at Kanu’s eyes while twisting the focus ring, back and forth slowly if necessary. Stop when you get the sharpest view on the live view LCD. Now click the shutter and take the photo. If you compare the live view manual focus photo with the single point auto focus result above, you can clearly see that the live view manual focus in low light provide a much better result than single point auto focus.
5 – Camera Shakes
Even if your camera is sitting on a stable tripod, it still doesn’t mean that your camera will not be shaking. Even if the camera is on the tripod, pressing the shutter button will cause camera to shake on the tripod and result in blurry photos, especially for those that are shooting using a slow shutter speed. And because a lot of figure/doll photographer are using available light or hot lights, the shutter speed tends to be slow and camera shakes due to hand press of the shutter button is really an issue. To demonstrate, I have my Canon EOS 7D set on a tripod (Gitzo GT1541 Mountaineer carbon fiber tripod). Now this is probably not one of the most stable tripod to be had, but I’d say it’s probably better than what’s being used by most figure/doll photographers. I’m using only available light in this case, so my camera is set to F2.8 @ 1/4 second.
Here’s the result when I press the shutter button on the camera directly using my hand. As you can see the result is quite blurry. My hand definitely produced enough camera shake and the slow shutter speed of 1/4 seconds captured that shake and the camera shake translates into blurry photos.
One way to address it is to use a 2 seconds self timer available on just about all the current D-SLRs. This way you press the shutter button, remove your hand from the camera and let the shake to subside. Then 2 seconds later the camera fire the shutter by itself. Without the hand there to shake the camera, the result is much better. This is probably one of the most effective thing you can do to combat camera shakes due to your hand if you are shooing using a slow shutter speed.
Of course, the 2 second timer is not that convenient. For every photo you taken you need to wait 2 seconds for it to actually take it. Now certainly the 2 seconds delay is not an issue since we are shooting stationary objects. But it is time consuming. So for those who don’t mind spending a bit money for an instant satisfaction, a shutter release cable should be in your arsenal. The shutter release cable allows you to press the shutter button without actually touching the camera body. Therefore your hand will not introduce any camera shakes when taking the photo. There are both wired and wireless/infrared remote shutter releases. But a simple wired shutter release cable work just as good as fancy wireless ones. The following photo was taken using a shutter release cable. I can’t really see any difference between the photo taken using the 2 second timer versus the photo taken using shutter release cable. So in the end it’s a matter of if you want to save the money and wait for 2 seconds on every frame, or spend the money and get instant results.
6 – Aperture Setting
A lot of new D-SLR users and a lot of user that switched from point and shoot to D-SLR do not realize that on a D-SLR you need to control the aperture very closely. As explored in the Small Depth of Field section, a point and shoot have a much bigger depth of field. In fact most point and shoot user think that subjects in their photo is nearly always sharp. However, D-SLRs has a much smaller depth of field than point and shoot cameras. And because aperture directly affects the depth of field, the aperture you shoot with dictates how much of your subject is sharp and how much of it is blurry. Using the same online depth of field calculator from the Small Depth of Field section, I can calculate the following for my Canon EOS 7D @ 24mm with a subject distance of 20 inches.
| Aperture | Depth of Field |
| F2.8 | 1.81 inch |
| F4 | 2.56 inch |
| F5.6 | 3.64 inch |
| F8 | 5.19 inch |
| F11 | 7.47 inch |
| F16 | 10.9 inch |
Armed with that information, I put my Canon EOS 7D and Sigma 24-70 F2.8 on the tripod, set the camera in Av mode, set the lens at 24mm, manually focus using live view, and shot the following series in different aperture settings. This is to show you just how much depth of field you’ve got in different aperture settings. I choose Saber Lily 1/7 PVC as the model because her pose actually covers a relatively large depth. I shot Saber in full length, but the following series of photos are only a center crop to provide a larger view.
First one is at F2.8. Very shallow depth of field. Only Saber’s head is clearly sharp, and you can see that her arm and gauntlets are all blurry and are outside the depth of field range.
This is the result at F4. The gauntlets is still blurry but definitely much sharper than F2.8.
This is at F5.6. I typical shoot my figures at F5.6 or F6.3. I choose this aperture because it can keep most of the figure sharp without worrying about miss focus, yet the depth of field is still small enough to blur out any background subjects. (F5.6 has a depth of field of 3.64 inch.)
This is the result at F8. I will use this setting for figure of this size if I need to shoot a group of figures that are positioned at different distance to the camera. There are a bit over 5 inches of depth that will be sharp at F8, this allows me to have two figures staggered yet I can keep both figure’s face sharp.
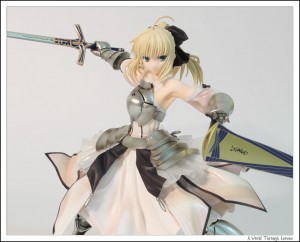
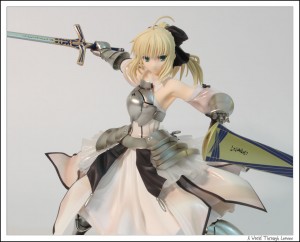
Photo to the left below is shot at F11. Photo to the right below is shot at F16. I don’t tend use aperture like F11 or F16 or smaller in single figure photography. As you can see that at subject distance of 20 inches, the depth of field at F11 is ~7.5 inches, that’s more than the depth of most figures. Only a few rare figures have a depth more than 7.5 inches. So unless you are shooting a group of figures at different distances to your camera, I don’t see any reason to use F11 or F16. And if you check out my photo on Suzumiya Haruhi Extravaganza Version PVC Figures, I shot 3 of those figure together at F8 yet still pretty much kept all 3 girls sharp. If you compare all the photos in this series, you will see that the photo at F16 is a bit different, it’s in fact a bit darker and a bit blurrier. Now the camera is set to Av mode and the exposure is definitely calculated correctly. Why is F16 behaving oddly? I will explain the reason for the difference in the next section.
That aside, you can see that you need to control your D-SLRs depth of field. By selecting your aperture wisely, you can blur out the region that you want, yet keep the region you want to be in focus sharp. You have to do this for D-SLR because D-SLR has a much shallower depth of field.
7 – Diffraction
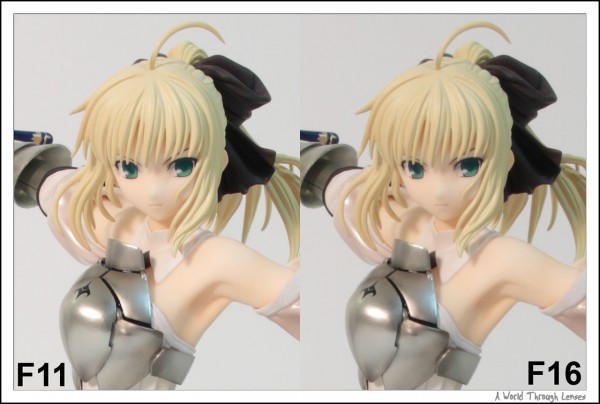
This is the last thing I will talk about on the D-SLR that may make your photo blurry. I’m not going to explain what diffraction is (you can check out the wiki page on diffraction or search on Google) other than it affects your optical imagery when your aperture is set to be very small. The result is that it reduces the actual resolution your camera can capture. On Canon EOS 7D it was posted by others around the Internet that the diffraction will kick in at about F11. As you have see in my Aperture Setting section that photos taking from F2.8 up to F11 are all pretty much with in expectation. With each increase in aperture, the region that’s sharp increases. However, the photo taken at F16 seems to be darker and if you compare them closely, it seems that the photo taken at F16 is actually blurrier than the photo taken at F11. And you are right to think so. If you click on the thumbnail to look at the larger photo of the following comparison image. This is a 100% pixel crop side by side comparison of the same figure shot, the only difference between the two shots are that the left one is taken at F11 and the right one at F16. You can clearly see that the F16 is a bit blurrier than F11. This is not due to miss focus, the focus was manually set before the series, the camera is on a tripod and the shutter is triggered using a cable release. It is actually caused by diffraction which kicks in after F11 and resulted in the reduction of sharpness. So be cautious if you like to set your aperture above F11, you need to know that you are definitely giving up some of the available resolutions. So unless you absolutely have to, (and from the depth of field calculation you rarely have to) you probably should keep your aperture at or below F11 on Canon EOS 7D. And if you are using different D-SLRs you should be able to find when diffraction kicks in for your camera. On most of the lower resolution D-SLRs, diffraction kicks in after F16. On higher resolution cameras like the 7D, it kicks in right around F11. And if you are using one of those really high resolution camera like a Canon 1Ds, diffraction kicks in as early as F8.
And this concludes my how to tame the focus tutorial. I hope it was educational to some of you at the least. And I hope it is useful in helping some to capture that sharp photo they always wanted.
Nice tutorial… I’ll keep them in mind… ^^
An excellent article! I especially appreciated your comments re P&S vs DSLR since I use both. Well explained with lots of images to refer to as you read.
One of the best articles on DOF I’ve seen!!
Thank you very much for taking the time to write & post such a great article.