I’m going to call this a figure/doll photography 121. It’s not a 101 because even though what’s presented here is what I know of, it may or may not be correct. It’s not a 123 since I’m not really providing a step by step instruction. So some where between 101 and 123, I hope this becomes helpful to someone. And through that, the knowledge is transferred from one to another, and hence the name 121.
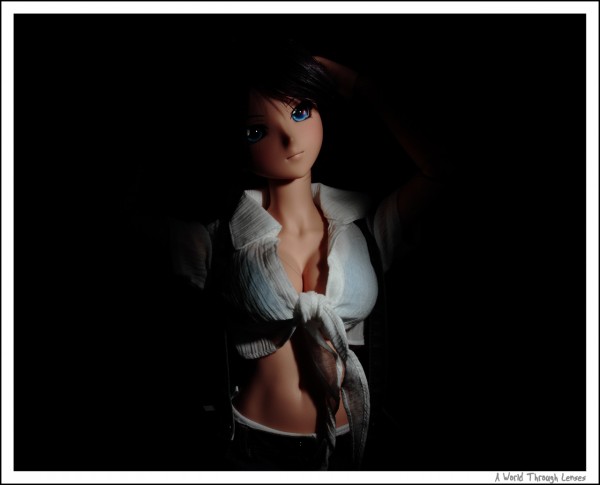
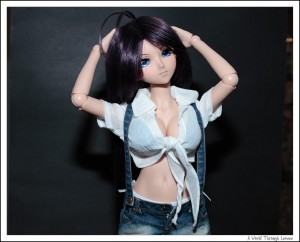
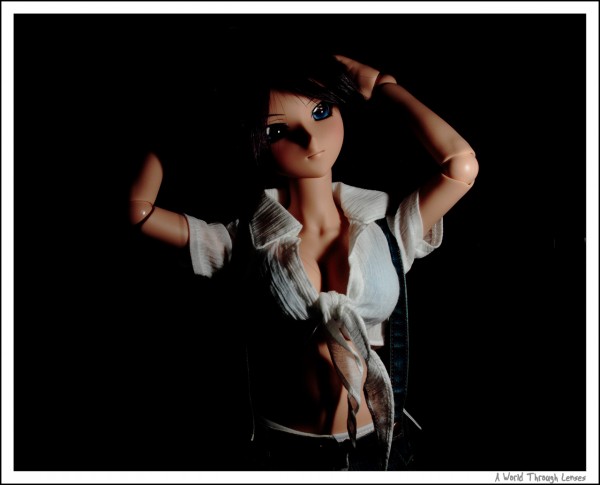
Black background, there are a lot of myths about it. There are talks about how to use black seamless paper, black cloth, or even black velvet behind the subject to create it. Then there are talks about using post production editing tools such as Photoshop to achieve it. However, neither of these approaches produces what I would call a true black background. Black background material is always visible due to light reflection, even black velvet shows up under some lighting conditions. And then there are many cases where the use of background material is just not practical or not possible. Photoshop on the other hand, will product a true black background, but typical masking technique to mask out your suject will produce an unnatural edge around it, this is on top of the amount of work needed to mask the fine details. In this post, I will try to walk through my technique in creating what I would call a true black background, just like what I have done below for Dollfie Dream Kanu Unchou. I’ve used this technique for many years now, mostly for floral photography but used sparsely for figure photography as well. however it can easily be applied to much bigger subjects such as dolls, real people and even other bigger subjects that you might want to photograph. And it’s all done straight out of camera with no background material and no Photoshop work.
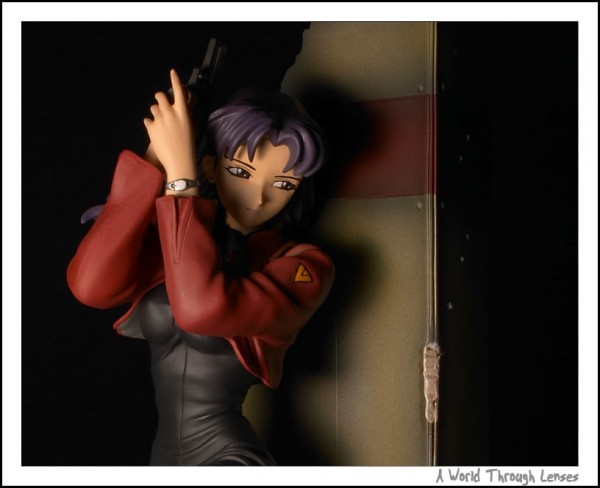
Let’s start from the beginning. You often see black background in photos. It is very popular for floral photography, but you also see it in portrait photos and other kind of photos. For photos of figures and dolls however, you don’t often see black background used. And when I do see black background, it is often gray rather than black. I personally don’t use black background often in my figure photos either because I wanted to capture details of the figure rather than create that dramatic look. I do use it some times when I think the figure needs that dramatic appear. Here’s a few of my photos that utilized the black background.
This is one of my figure photo taken in 2005 – New Line’s Katsuragi Misato cold-cast figure.
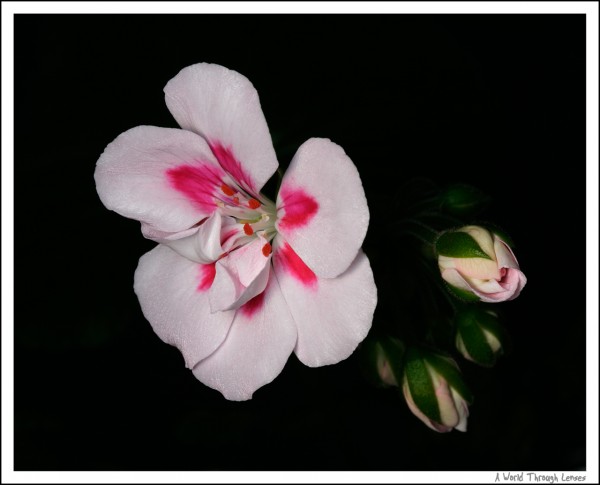
This is a floral shot taken back in 2004 from my Floral photography at home post.
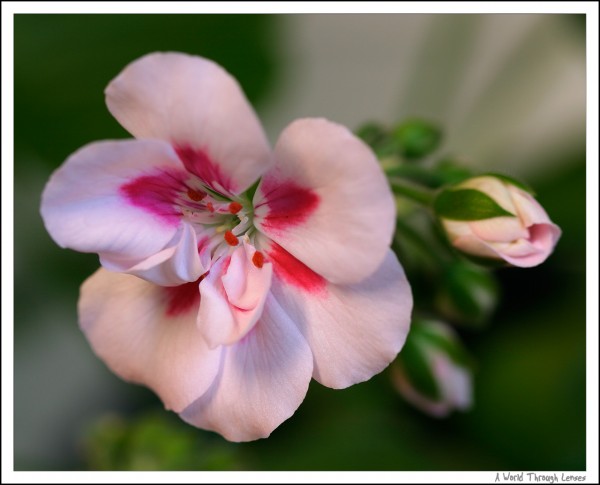
If you click to see the larger version for these photos above and check out the details, especially the geranium photo, you will see that these photos are drastically different from what you can get from putting a simple piece of black background material behind the subject. The flower, for example, simply came out of the darkness. You can try as hard as you want, but you will not see any background material behind the flowers. In fact the photo with black background is pretty much the same photo as this one below. Only difference is lighting technique and camera settings. And as you can see there’s no way I can put background material behind these flowers without destroying the flower itself. And i can assure you that there’s no Photoshop masking behind the photos above.
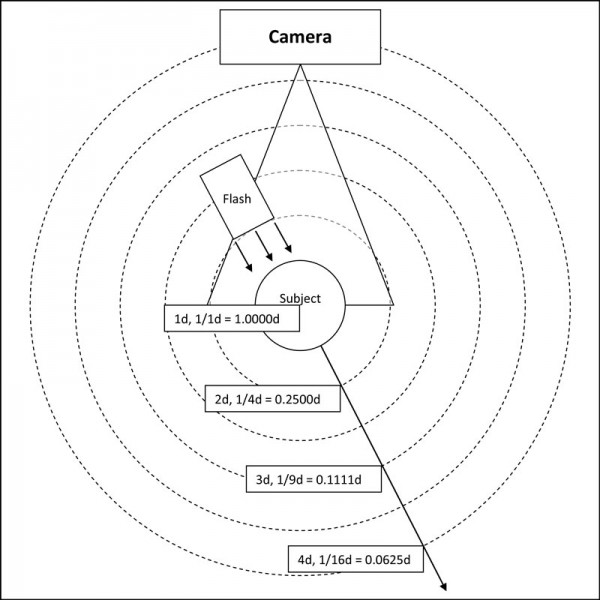
So how are these black background produced? First, a little bit of science behind it. I’m neither a scientist nor do I have official training in photography. So this is just my understanding in this subject matter. There is an inverse square law on light intensity falloff. It states that the intensity of the light falls off as square of the distance from the object. Or in mathematical terms y = 1/x^2. This means that a subject at 2 meter (6.6 ft) away is 4 times darker than a subject at 1 meter (3.3 ft) away. And a subject at 3 meter (10 ft) away is 9 time darker than a subject at 1 meter (3.3 ft) away. In the diagram below, I try to put the science into photography terms. Here we assume that a single flash is the only main light source. At an arbitrary distance 1d the subject is properly illuminated. At double of that distance 2d, subject will lose 75% of the light, and at triple of the distance 3d, subject will lose 89% of the light. The “d” here is an arbitrary distance unit. It can be 1 m, 15 cm, 1 ft, 3 in, or any thing you want.
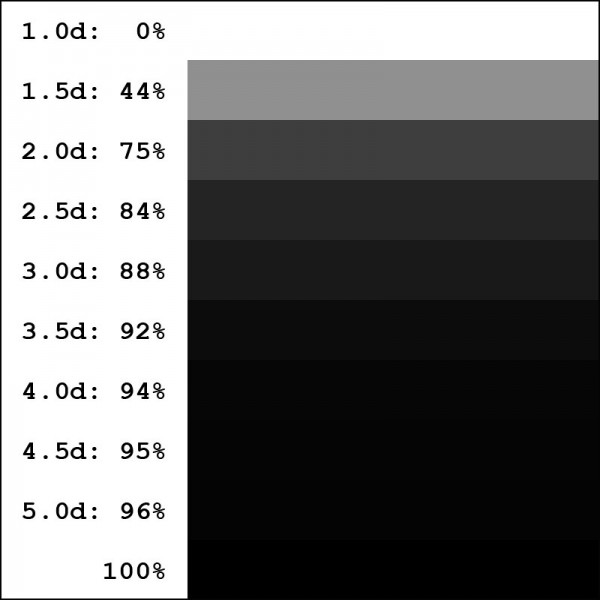
Here’s a simple chart to visualize the amount of light falloff. So here we put 100% white at 1.0d indicating it’s properly illuminated. The chart shows in 0.5d increment from 1.0d to 5.0d how dark it will get from 100% white. The last stripe is 100% black. Keep in mind that there is no 100% black in real life situations. There are always some ambient lights no matter where you take the photo. However there is a limited dynamic range that camera can capture. So in most cases at 4.0d it will be pitch black and will certainly be pitch black when you go to 5.0d and beyond.
So just how does this has anything to do with black background? If I place the subject in an open space. I can place the light source extremely close to the subject (or as close as I can provided the desired lighting can be achieved). I can adjust the light intensity accordingly so that I properly light the subject at that extreme close distance. In that setup, everything will become black at around 4 times the distance between the light and the subject and beyond. And that’s exactly what I am going to do below.
Now let’s start with the tutorial on how to do this in reality. First is what you need. You need a D-SLR or any other camera that allows you to use an external flash. You need an external flash unit. Automatic flash metering (E-TTL/i-TTL) is not necessary and not used here as the flash is used as a simple manual firing unit. So any cheap external flash will do. You will also need a off shoe flash cord so that you can fire the flash with the flash positioned somewhere else closer to the subject and away from the camera. There are expensive flash cords from the camera manufactures, but there are also a lot of really cheap 3rd party flash cords that works just fine. We don’t need automatic flash metering here (no E-TTL/i-TTL capability), so a simple flash cord will do. I have enlisted the help of Dollfie Dream Kanu Unchou to be the model in this demonstration. Kanu Unchou is actually very big, at a scale of 1/3, she stands around 60 cm (23 in) in height. I used a doll in this tutorial because this is probably one of the largest subject one would want to photograph in a small room. The technique descried here works on any scale, but if the subject is larger, then the setup needs to be scaled up accordingly. I put Kanu on a doll stand on top of a tripod, then I have my camera, a Canon EOS 7D, on another tripod some 50 cm (20 in) away from Kanu. With both the subject and camera fixed, I was able to produce all the following shot nearly identically so that you can compare one to another. The only difference between all the shots of Kanu are camera settings and flash setting and/or position of the flash. Of course no Photoshop work involved here other than cropping. All photos have higher resolution linked so you can click to see more details.
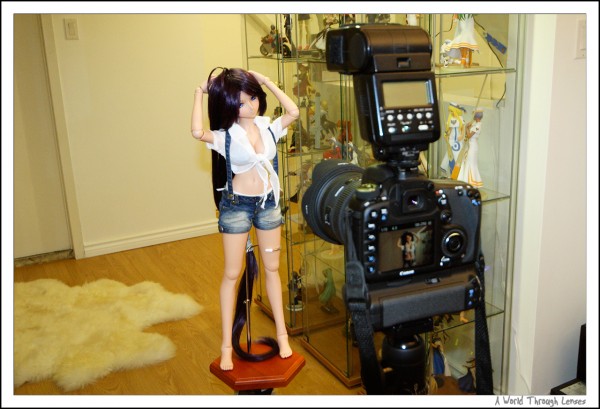
To start off, I setup my camera and flash like what you typically would do. I put my external flash (in this case an old Canon 550 EX) right on the camera flash hot shoe. Other than that the flash is sitting a bit higher and that the flash is bigger and more powerful, this is no different than using the on board flash of any camera. Here I want to capture what I call a typical shot the way everyone else typically get from their camera.
Now because a lot of people out there doing figure/doll photography actually don’t own a flash, or prefer hot lighting (lighting with your “hot” lamps). I’ve done this typical shot using both hot lighting and flash below. Photo to the left is shot using hot lighting, flash is turned off and a big lamp is illuminating the doll. Shot the photo at F4 @ 1/16 sec to expose it properly. Photo to the right is shot with the flash mounted on the hot shoe like setup shown above. Camera is set at F4 @ 1/100 sec. In both case you can clearly see my room behind it. I was actually doing this is a small narrow room just so I can show you that a big space is not required to achieve the desired result.
So how about placing a black background material behind it? I placed a piece of black paper background behind the doll and here is the result. The photo to the left is again shot using hot lighting, F4 @ 1/16 sec. And the photo to the right is shot using flash at F4 @ 1/100 sec. In both cases you can clearly see the black paper texture as well as the shadow cast by the light. You can also see reflection of my lights on the background especially on the photo using flash because the light intensity of the flash is much higher. Also, my piece of black paper is not big enough to cover the background. In both cases I got some spaces in the photo that still have my room showing right through it. In order not to see the paper texture (or cloth texture if you are using fabric as the background), you can either increase the aperture or move the background further away so that they are blurred out. I’m already at F4 so I don’t think I can increase the aperture much more. Now to move the background further back, it means I will need a really big piece of background material in order to cover the frame. In fact I probably need a piece of background material as big as my room to be able to blur out enough so that the texture doesn’t show through yet still enough to cover the background in the frame. This is another reason why I said above that using background material is sometimes not practical.
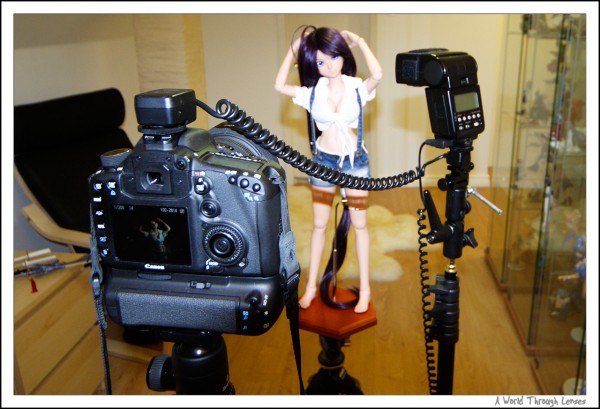
Now let me introduce my real black background lighting setup. Here my external flash is placed on the side and connected to the camera via a off shoe flash cord. It’s sitting on a stand for illustration purpose only. In fact I shot all the photos of Kanu while holding the flash right in my hand. The flash is placed very close to Kanu, around 25 cm (10 in) away from Kanu but just outside the field of view of the camera. If I move the flash any closer to Kanu, it will actually show up on my picture. I have nothing behind Kanu, the wall is some distance away from Kanu. The closest thing to Kanu is actually my glass display cabinet at around 1m (40 in) away. I actually aimed at the glass cabinet for a reason. For the best result, you would want to do this in an open space and avoid any high reflective material (such as glass, mirror, polish metal, etc.) in the background. But I want t show you that even with these reflective material in the background, it is still possible to achieve the desired result.
Here’s another setup shot just to show you how close I place the flash from the doll.
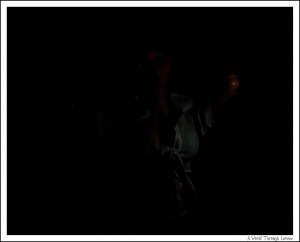
Now back to photography and the “sunny 16 rule”. The “sunny 16 rule” states that the proper exposure under a sunny day any ISO would be roughly F16 at 1/<ISO Number> sec. So for ISO 100 under a sunny day, the proper exposure would be roughly F16 @ 1/100 sec. I have set my camera at ISO 100, but bumped the shuttle speed to 1/200 sec so that I’m 1 full stop under the “sunny 16 rule”. Then I set my aperture at F22 so I’m now at F22 @ 1/200 sec and now I’m 2 full stop under the “sunny 16 rule”. And keep in mind, I’m indoor in a room, not outside under a sunny day. What I want to do here is to get a completely black frame without the flash. This way any ambient light in the room will not impact my flash and my flash will be the only primary light source. Of course with that setting, without the flash, I get a black frame like the one below.
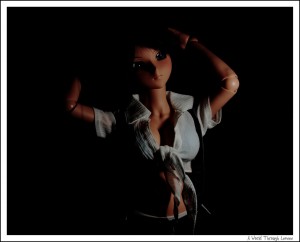
Now I can turn on the flash and play with the flash settings. I put the flash in manual mode and dialed in the power settings. I don’t want to use automatic flash metering because I would like to control exactly how much light I output. Here’s the result on my setup with flash power set to 1/128 power all the way up to 1/4 power. The flash power setting is different from flash to flash and the result also varies depend on where you place the flash. So this is just a guide and not meant to be taken as is. One need to vary the flash power and try difference distances and power settings to get your optimum amount of light output.
Left: 1/128. Right: 1/64.
Left: 1/32. Right: 1/16.
Left: 1/8. Right: 1/4.
At 1/4 power, Kanu is a bit over blown, so 1/8 and 1/16 seems to be the better choice depend on what you are after. Also remember what I said about try to avoid highly reflective material in the background? My display cabinet has glass as well as a metal frame. Both are highly reflective. I was able to angle the flash so that the light doesn’t bounce back towards me from the glass, but the metal frame I cannot avoid it. At 1/8 power and more obviously at 1/4 power they really start to show up in the picture. If you click on the thumbnail above to see the larger photo, you can see some shiny vertical stripes of metal just to the right of Kanu’s elbow. Not a big problem but if I were to shot this for real, I would choose a direction where there’s no shiny material in the background.
So this is the shot at 1/16 power where the flash is shining from Kanu’s left like I shown in the setup above.
Now you can get a bit more creative and try to place the flash at different positions.
From Kanu’s right side.
In the middle, held high, aiming down towards Kanu.
In the middle, held low, aiming up towards Kanu.
Pretty different result right? All just by changing where you are placing your flash.
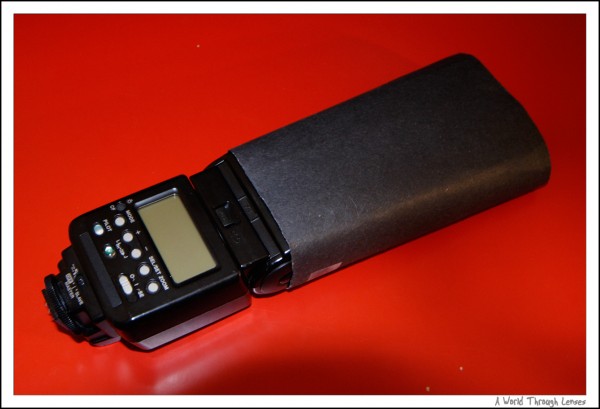
Trying to be more creative with what I’ve got. How about a spotlight kind of effect, you know, like those used in stage shows. Well a simple piece of black cardboard paper will do the trick. Here I just taped up some black cardboard paper around my flash. This creates a scope that will restrict my flash output to the smaller circular opening at the other end of the cardboard.
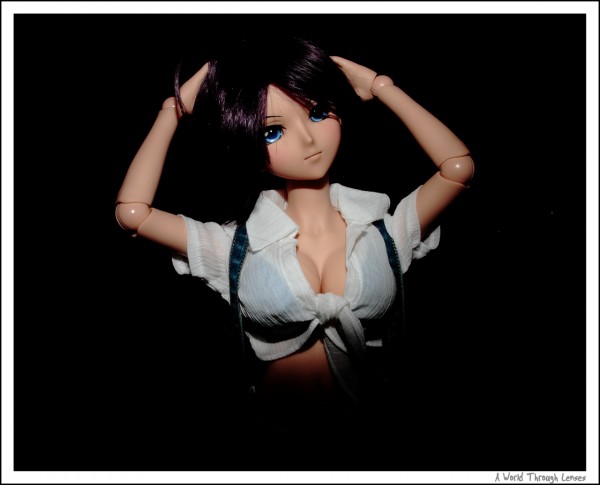
And here it is – a spotlight. I shined the light right on the face and the upper body of Kanu. I do have to try a few times to make sure I aimed my “spotlight” at the right position.
Now trying to be even more creative. Since that was just cardboard paper that I taped around my flash I can actually use my hand to shape the opening of the the light to different shapes. And by simply changing the shape of the opening, I can create a lot of interesting results.
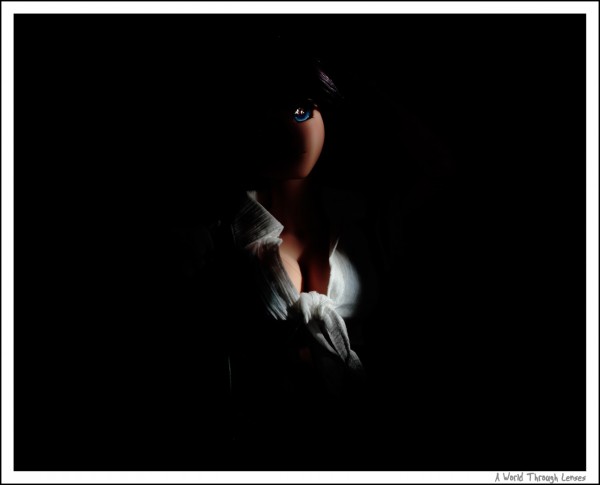
Here I aimed my light from the very left of Kanu and I pinched the middle of the opening together so there are two small openings, one on the top illuminating her face and the other illuminating a it of her upper body.
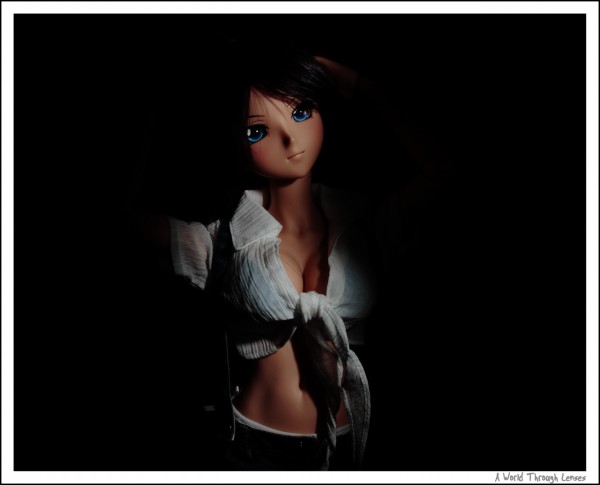
Here I aimed the flash only slightly to the left of Kanu. The same pinch in the middle was done here, but this time I also rotated the flash 45 degrees.
This time I pushed the opening together to form long thin slit, giving it a kind of barn door effect.
All that with just a piece of cardboard paper taped around the flash. No expensive lighting equipment is involved here. Yes an external flash will cost a bit, but honestly all these are doable without a lot of money invested in equipments.
So what does scale or distance have anything to do with this? Remember I said the flash was 25 cm (10 in) away from Kanu? Well that’s necessary because if I place the flash any closer, it won’t illuminate the entire doll’s body. If I were shooting something smaller, I can place my flash much closer to the subject and therefore achieve true black background in a much smaller space.
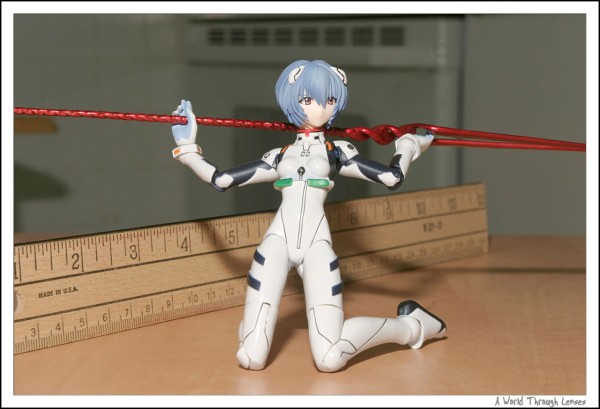
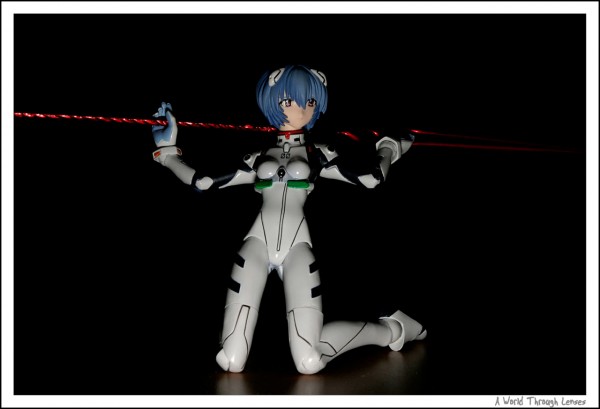
The following was shot back in 2008 using a Kaiyodoo Fräulein Ayanami Rei as model. First is again a typical flash on the camera shot will look like. Rei was put in a keeling position about 10 cm (4 in) high. I placed a ruler behind Rei to get some kind of measurement of how quickly true blackness is achieved. Here you can see with regular flash, my background – table, stove, cabinets – are all clearly visible.
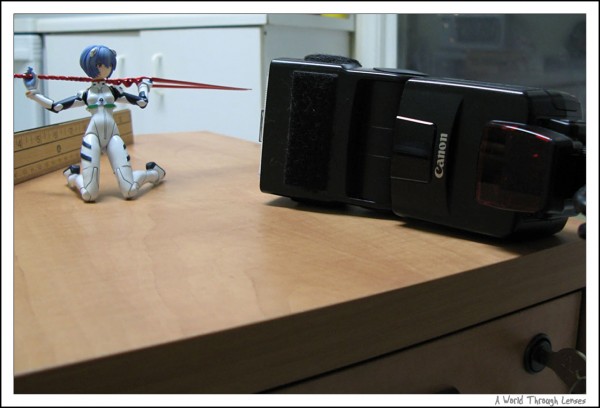
The flash was then set on the off shoe flash cord and placed some 5 cm (2 in) away from Rei. The photo blow shows just how close I placed my flash.
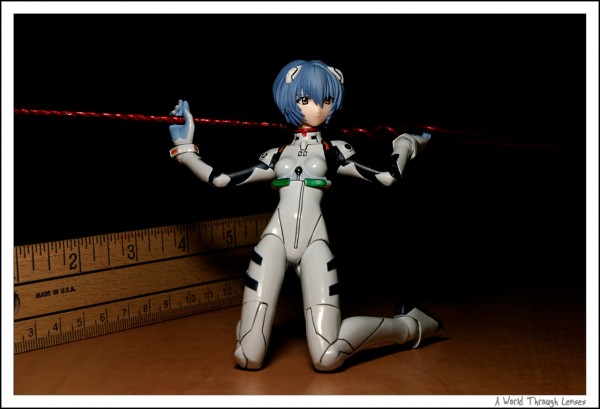
And here’s the result. In this shot the flash is actually coming from right of Rei. At 4.0d or 20 cm (8 in) it is already completely dark as you cannot see the 20 cm (8 in) ruler marking at all. The 20 cm (8 in) mark is otherwise very visible in the typical shot above just behind Rei’s leg.
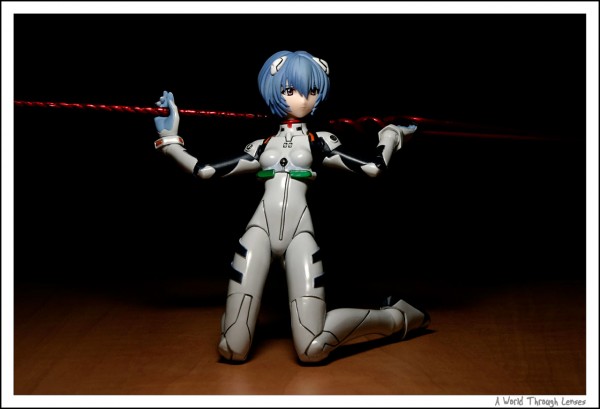
A couple of more photos without the ruler. This photo was shot with flash held high and aim down towards Rei. You can see how the flash illuminated the surface Rei’s kneeling on.
This photo was shot with the flash held low and aim up towards Rei. Since no light is shining downwards, even the surface Rei’s keeling on is nearly completely black despite being a light wood colour.
So to achieve black background with a single flash for 1/3 dolls at 60 cm (23 in) , I need at least 1 m (40 in) of open space, the more the better. But to photograph a small figure 10 cm (4 in) high, I only need 20 cm (8 in) of open space. I can easily do this for most figure sizes right on my desk. All of these are basically determined by how closely you can place your flash to the subject. The closer you can place the flash, the less open space you will need to achieve black background.
And with that, I conclude the black background tutorial. I hope this will be useful to some figure or doll photographers as they seek how to produce that true black background. And remember, the exact same principle and math applies as you scale bigger. So if you want to do portrait of real people, or some other larger subject, the same idea can be applied. You just need to scale the distances appropriately.






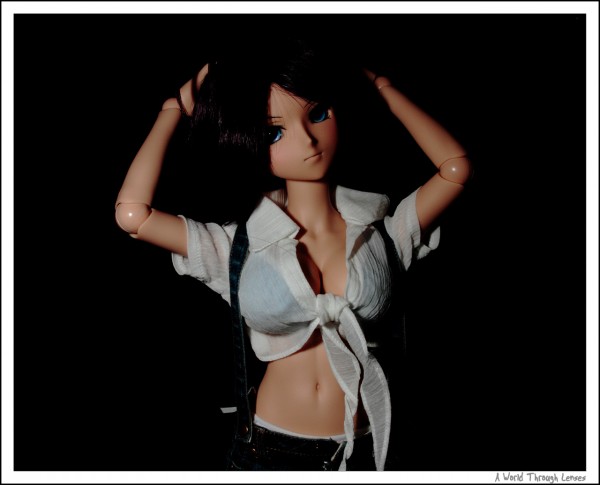



very interesting article phoenix
thanks for the share
An intriguing technique – though I’m guessing for all these you need to turn off all other light sources other than the flash?
I don’t think you actually ever mentioned about turning the lights off in the room lol Although I could be mistaken.
Oh, and just a general update – Nanoha is sitting in her box, inside a cardboard box on the floor behind me. Once I move my desk into my new area, I’ll get her out and be sure to photograph the event 😉
Actually no. I don’t need to turn off any light (that’s why there’s no mention of turning off lights here). I shot all these black shots with the same amount of room light that you can see in the setup photos presented in this article. One can almost say the room is actually very bright, one fluorescent light right overhead and two other table lamp sitting somewhere else in the room, plus there’s actually LED lights in the display cabinet all were on when the shots were made. The key here is that I setup my camera (in my case I have it at ISO 100 F22 @ 1/200 seconds) so that without light my flash, it will produce an black frame. And therefore any amount of ambient lights in the room really is irrelevant.
Good news on Nanoha. Can’t wait to see her. Hopefully your Moe is on the way too.
o.O – I take it back then lol
This intrigues me further! haha
I get what you mean now too, for some reason you just saying “so that without light my flash, it will produce an black frame” made the whole thing click in my head, where before I was a bit confused. Then again I was reading this with eye strain at 10 past midnight :/
Moe’s in the UK, awaiting me paying for Customs Charges – so I need to receive the letter in the post with the ID so I can pay online. Why they can’t send me an email with the parcel ID and charge to pay I don’t know. Would certainly mean I don’t have to wait for Moe to get into the UK, to then be sent a letter, which takes a few days, and for them to then finish the delivery 🙁
Excelent photography tips!!! Could you post some about pictures with white background and other lighting tricks?
A bit late, but just posted a white background tutorial.
Great tutorial!
Can you do a tutorial on…
1. how to do a gradient background?
I always see the grey gradient: http://d.hatena.ne.jp/UNOYO/20100322/p1
And how to do a color gradient: http://mizuakuta2.seesaa.net/article/144621649.html
2. how to do a reflective base?
http://hk.myblog.yahoo.com/c.hemoss
1. Gradient background that you have posted are mostly done just by using gradient paper. Now it is possible to do gradient by using as solid colour background and then use a dedicated background flash/strobe to create the gradient. But 1. the you picture posted are probably not done using that technique. And 2. it will be a bit more expensive on equipment that you have to buy than most typical figure shooter are willing to invest in.
2. The reflective base can be done exactly the same as I would do black background. But place the figure on a slightly more reflective surface. I probably start with semi-gloss or glossy printer paper, although I know there are people using glasses on black papers. Personally I think semi-gloss or glossy printer paper creates a very nice reflection on the bottom already. the trick is to make sure your lighting is horizontal and slightly upwards so that it only shine very little light on the base and secondly you are shooting at a low enough angle so that you can catch the reflection.
Could you tell me whether any exposure compensation and diffuser on the flash are to be used for very samll insects.
Thanks
Well in general if you are doing flash photography on normal scenes, you probably want to use some kind of diffuser on a flash all the time because otherwise it tends to produce very harsh lights on your subject. But since your comment is in the black background tutorial, then I’m assuming you are also trying to produce a black background. When trying to produce black background, you want your light to be very targeted, single directional, and only shines on the area that you wanted to shine on. And a diffused light basically goes to all kind of directions. So if you use a strong diffuser when trying to produce black background in my setup, you will see the back ground instead of pitch black. So I won’t use diffusers if I am started in setting up black background. When you get more experienced, you can use some mild diffuser to soften the light a bit. But that’s only when you are very capable of controlling the lighting.
Thanks a lot for your expert guidance.
VP Singh
Excellent tutorial on this topic that I was confused by reading other materials or books. Thank you!