Last night the sky was clear with no cloud coverages. My friend and I drove to a farm near Pickering and did some star gazing. I brought my camera gears along to do some simple astrophotography.
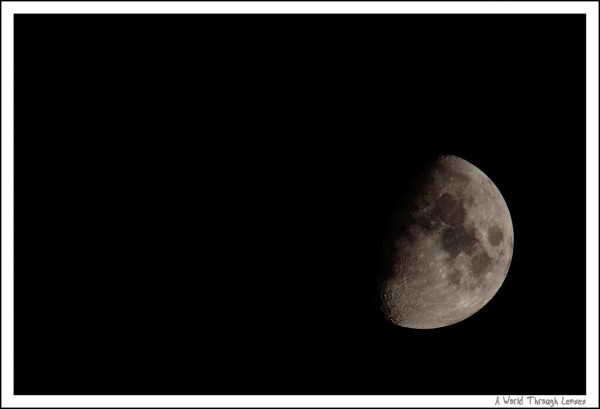
First easy target for the camera is the moon. I’ve posted my photo of the first full moon of year 2010 before. Beautiful as the full moon is, it is actually too bright and does not have enough contrast on the moon surface to see some of the craters. A new moon will actually offer much better details than a full moon because of the contrast provided by the shadows on the moon’s surface. Last night is 2 day past moon’s first quarter, the moon is actually about 57% full. However it still offered enough shadows on the moon’s surface so that some more details can be seen.
The same gear as the last moon shot was used. Canon EOS 7D was coupled with Sigma 100-300 F4 & Sigma 1.4x teleconverter all sitting on the Manfrotto 055 Pro tripod. This gives me a relative stable platform for the camera and an equivalent focal length of 672mm. The following photo was shot at ISO 100, F11 @ 1/100th second.
Here on the cropped shot, you can see just how much more detail the same camera and the same lenses was able to capture. Compare that with my photo of the full moon from earlier this year. Using the same equipment, the difference clear that the shadows on the moon surface allow much more craters to be visible. For the beginners, keep in mind that you should not focus beyond infinite on your lens when you are photographing the moon. Even though the moon is far away, twist your focus all the way to the end on your lens will not yield a sharp image. Instead, if your camera has live view feature, turn the live view on and zoom to the maximum magnification your live view can support. Unfortunately for those without live view capabilities, optical view finder is not nearly as good even with a magnifier. Now adjust your focus around the infinite mark. Make sure you adjust in very tiny increments, adjust and release your hand. Make sure you are not touching the camera or the tripod while checking the focus result. Then adjust tiny amount again if necessary, and release your hand and check the focus result again. Repeat until you reach the optimal focus position. It is important that you release your hand and make sure you are not touching the camera or the tripod while checking the focus result. Even with camera on a tripod, your hand will move your camera enough to affect its focus. And of course always shoot with a release cable so that you don’t affect the focus while you are taking the shot.
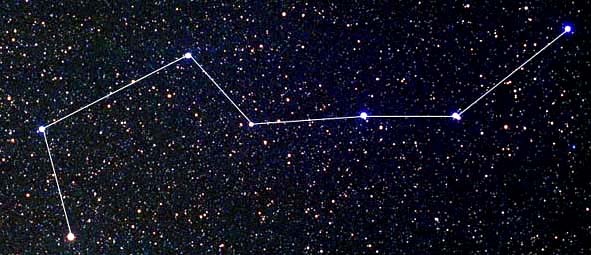
The second thing I planed to photograph that night during my star gazing trip was the star trails. And specifically I wanted to capture the circular trail of the star as they move around the sky. Now the trick to do that is to identify Polaris (or the Northern Star) in the night sky. To identify Polaris, first you have to find the constellation Ursa Major (or the Big Bear) in the sky. The seven brightest start in Ursa Major forms a kind of spoon shape (see below) and it should be very easy to see in the sky.
Now once Ursa Major is identified, look at the tip of the “spoon” (the left most two star in the picture above) . The left most star which is vertically in the middle of the picture above is Merak and the second left most star at the bottom of the picture is Dubhe. If you draw a line from Merak to Dubhe and continue outwards, you should see a bright star somewhere along the line, and that star is Polaris. Stars in the night sky moves around Polaris and creates a circular pattern right around it. And that’s what I wanted to capture.
So how do you go about capturing the star trails? First of all, you will need a camera that hopefully supports bulb mode for long exposures. An SLR camera is preferred. The camera needs to support remote shuttle release either through a cable or a remote. You need a good tripod to support camera and keep the camera from moving while shooting. And you need a lot of time. You want to set your lens to manual focus because it’s dark in the night and there’s nothing to focus on. You want to setup your camera to the bulb mode so that long exposure is possible (30 seconds exposure also works but I think longer exposures works better). Then you would want to put your camera on a tripod and connect the release cable. If you want to capture circular patter of the star trail, then you would want to find Polaris on the sky and then aim your camera towards it. Then there’s two ways to capture the star trail. The traditional film way would be do a single long exposure for hours or whatever length you liked to do. This method, while worked well in film cameras, does not work well in digital cameras. The digital camera with its electronics creates lots of noises if left continuously on in the capture mode. The end result is a picture with a lot of noises and hot spots created by the heat in the electronics. So in the digital world, it is commonly done by taking many shorter exposures (from 30 seconds to 5 minutes) and stack the multiple photos together later in software to create the star trails.
Once I was at the location that I wanted to shoot the star trail, I setup my tripod and did a few test shot to make sure that my exposure is good. My camera was set to ISO 200 at F5.6. Now if I only have a basic release cable, I would need to sit beside the camera, hold the release button, and count the time with a watch for the entire duration to take those series of shots. However, a timer release cable makes the job much easier. I just set my timer release to expose for 2 minutes with 1 second interval delay for a total of 45 frames. Start the timer and let the timer release do its job. The 45 frames should cover a duration of just over 1.5 hours. Unfortunately there’s not much you can do while this lengthy process is going on. So I walked away from my camera and hoped for the best.
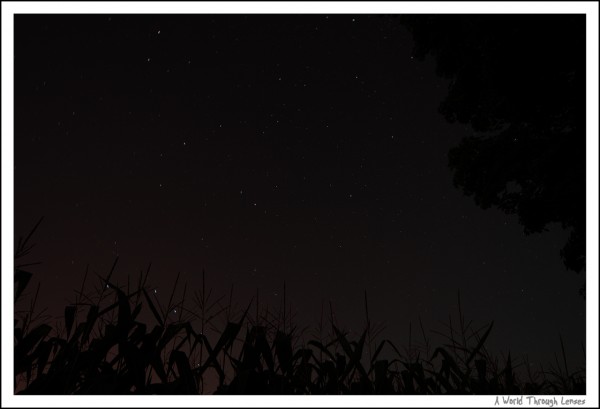
Here’s what a single frame of 2 minutes exposure of the night sky looks like.
You can’t really see any trails from the stars, but at the same time the stars are no longer a single point any more. You can clearly see some motion captured within that 2 minutes. Motion is especially visible with Usar Major which is located at the bottom left corner just around where the corn field is. Those 5 bright spots are Ursa Major’s “handle of the spoon”.
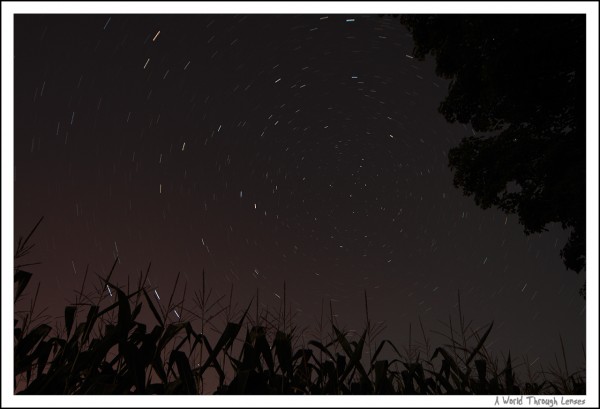
Now if you stack 5 frames together, this is what it looks like. Now you can start to see the trail created by the stars. This is effectively a 10 minutes exposure.
The photo below is the result of stacking 10 frames together with a total effective exposure time of 20 minutes. Star trails are not forming nicely. And you can see the circular patter start to emerge as the star turns around Polaris which sits right in the middle of the circular pattern.
Here’s a stack 20 frames with a total effective exposure time of 40 minutes. The star trail is really forming nicely.
Unfortunately for me disaster struck. The night is cooling down quickly and the humidity in the air was high. So as the night progresses, ground fog developed and there was heavy condensation on my equipment. At the end of the 1.5 hour interval, my camera’s outer surface was totally wet, and my lens is covered with condensations. Nearly nothing is captured in the last 45 minutes or so. Not only further staking of the photo didn’t produce more star trails, the condensation on the lens blurs my photo so that the photo to get blurrier as I stack more photos onto it.
As a illustration to my condensation problem: to the left is the result of 30 frames stacked together and to the right is the entire 45 frames stacked together. And if you look at the enlarged photos, you can see that it gets blurrier as more photo is stacked together and not much more star trails are captured except maybe for the two star in the center.
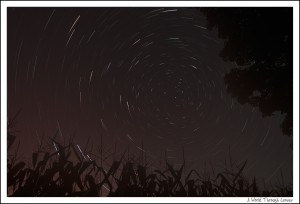
After going through all of the frames one by one, it seems that the best result was achieved when I combine 17 frames together with a total effective exposure of 34 minutes. More than half of the frame from the run cannot be used. However even with only 34 minutes effective exposure, a circular pattern star trail was still achieved.
Here is a link to a higher resolution version of the photo above.
So some success with one major failure. Lessons learned that I need to keep in mind of the surrounding temperature and humidity, and maybe try to clean the lens if condensation start to become an issue during the run.
Just in case you wonder where I took these picture, Here’s a map showing you the exact spot where the photos are taken.
[google-maps type=”hybrid” zoom=”15″ showdetail=”” center=”43.922833,-79.177667″ marker1=”ll|43.922833,-79.177667|”]




I’m having a little problem with moon and, and night sky photos on my 7D. I can shoot the moon all night, no problem, even got the moon and the big dipper in one frame, the sky is all black. Great detail on the moon. So tonite there are alot of clouds. The moonlight is lighting the clouds and looks great. So I set up my tri and fire off and uh oh, the clouds look great but the moon is whited out. Just a blob of light, way worse using bulb mode even for just a few seconds. so I adjust the exposure down one step, two step (I generally shoot everything at – 2/3) but then the sky looses definition and still over exposed on the moon. I try adjusting the white in the display. if I use full detection the clouds look awesome all the way across the sky but the moon is whiteout. if I use spot the moon looks great but the sky turns, expectedly, black and I can’t see any clouds. So, what to do to effectively shoot both subjects? I could take two photos, one of clouds and one of moon, then cut and paste the moon over the cloud pic, but that’s not using the camera like i should, it’s cheating. I’d rather learn how to overcome the obstacle, not how to go around it. Can anyone out there provide the answers?
There must be a way . . .
You actually almost got everything. The problem is the dynamic range of the night sky. Yes the cloudy sky is very very dark and the moon, well it very very bright. And there’s simply too big of a difference between them. Now yes the 7D still have a very large dynamic range so that it is possible that it captured enough information. But if you want the photo to show details for the moon and the cloud both at the same time, it still takes a bit of “cheating”. What you can do without taking two photos and then cut and paste, is to take two readings, one full frame evaluative over the sky, and one spot on the moon. Take a look at the difference and take a photo using an exposure that sits at somewhere in the middle. You will get a photo if processed normally look a bit dark on the sky and the moon a bit darker and not as much detail. Then you will process that photo, one slightly darker to bring out details in the moon (that photo will be nearly completely black for the sky), and the other brighter towards the sky, and that photo will show the cloud details. Then you will combine them either using a mask in Photoshop or if the sky is dark enough you can use those Astrophotography software to do the combination too. I say it takes a bit of “cheating” but at least this is a shot from the one single photograph. Although to me, even though I am also the one shot kind of person, in this case, I think two photograph cut and paste is acceptable. :).