This is another one of my figure/doll photography 121 post. A few months ago, I’ve posted an article on how to produce a true black background without the use of any black background material and/or image editing software. I wrote about the black background because I find most people does not know how light works its magic in a photography sense. The people I talk to tends to instinctively come to the conclusion that if a photo’s background is black, then there must be something black behind it. If you have read my article, then you would see that a true black background actually resulted from a lack of light coming towards to your camera. Today I want to look at the opposite side of the gray scale — how to produce a white background?
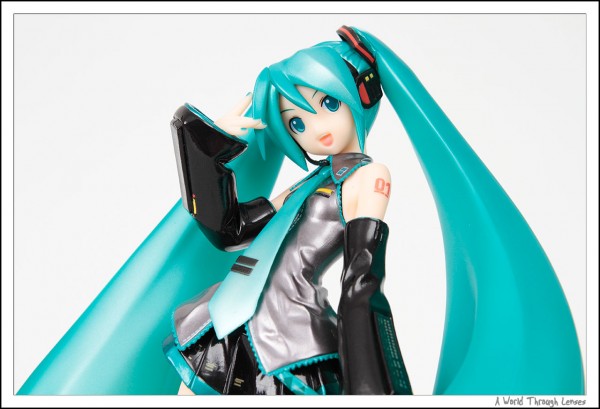
Well again a lot of people instinctively think that a white background is the result of placing some kind of white material behind the subject. Below is a photo that I took in front of a white fabric backdrop. However, when compared to the white frame that borders the picture, you can clearly see that the actual background is not 100% white. In fact if you load it into an image editing software, you will see that the background is somewhere between 96% – 92% on the gray scale. On the gray scale there’s only one white point which is at the very end of the gray scale. Anything that’s not 100% on the gray scale, or 255, 255, 255 in RGB value is not pure white. And 255, 255, 255 RGB value is what the background must be if we were to call it a true white background. Anything less is just a different shades of gray.
You might think fabric backdrops is not white enough, fabric has holes and it’s not flat, and so no wonder it is not white. Below is another photo that was taken in front of a smooth white vinyl backdrop. This is a solid and very smooth white vinyl backdrop, and probably the whitest thing I can find around the house. But the result is the same, the background still reads about 96%-92% on the gray scale.
In fact, looking at all of the photos on this web site that has a light neutral background, all of them are deliberately taken so that the background is about 96%-92% on the gray scale. I personally feel that white background is typically too bright and at times hides details. A true white background also creates problem if your subject is light coloured because it reduces the contrast between the subject and the background. So for that reason, I typically choose a shade of gray that’s very light, but not approaching 100% white. This way I have a neutral background so that the subject can be well presented and compared yet does not have all the problems associated with the 100% white background.
But what if you want a 100% white background? May it be to merge into the white background of your web site, or like the magazine shots to be printed on the white pages where the background has to be absolute white, there are times when you want to have a 100% white background. And today a common answer from people is why not just use Photoshop or any other image editing software to manipulate the image until the background becomes white. Well yes it can be done that way but this method also has its share of problems. So below I will show you a few method of obtaining 100% white background right out of the camera without the aid of any posting production. I will also outlining some of the issue associated with using image editing software to obtain 100% white background.
1 – Use the sky as the background
Just as a true black background has nothing to do with the material you put behind the subject, a true white background has nothing to do with the material you put behind the subject either. I’ve said that a true black background is created from a lack of light coming back towards your camera. A true white background is exactly the opposite. It is created from too much light coming back towards your camera. When there’s too much light coming towards the camera, it will eventually exceed the limit the camera’s sensor can sense and resulted in 100% white pixel being recorded. And one of the easiest source to get an overwhelming amount of light is the sun. The sun is probably one of the brightest light source you will find, and it costs you nothing to use it. A white background can be easily created by shooting towards a bright sky while have the camera setup to expose for the much darker subject in front.
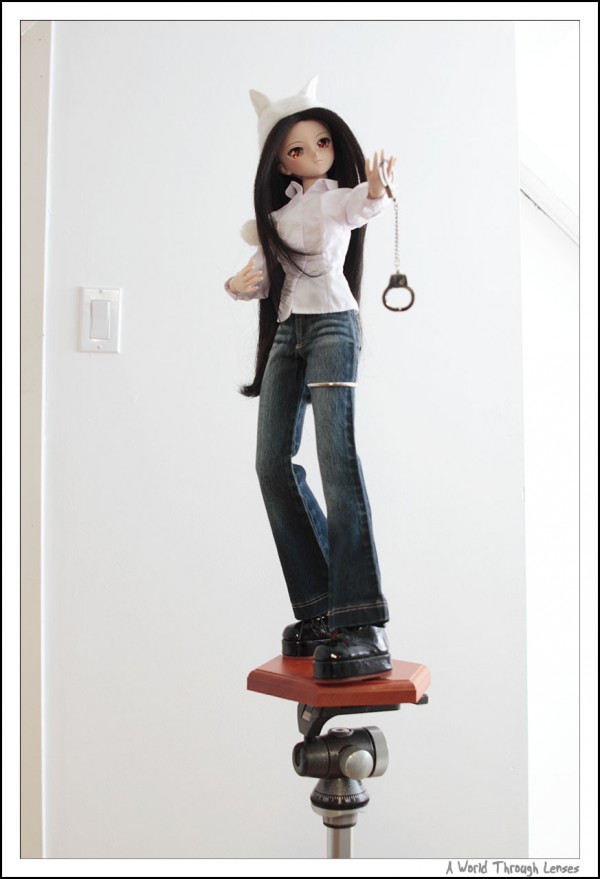
Now here’s the setup for the photo shoot I did for this tutorial. I’ve kindly invited Dollfie Dream Tohsaka Rin as my model. I used a window where I can see the sky clearly. The time is around noon, the sun is in the middle of the sky and shining brightly but not directly into the window. The doll is standing on a doll stand which is supported by a tripod right in front of the window. Here’s what the setup looks like.
Now the key here is what exposure setting to use. I am using my Canon EOS 7D here and have set the ISO to 200. By setting the metering method to spot metering, it will give me the proper exposure right at the active focus point. If I put the focus point right on the sky, it reads 1/5000 second at F4.0. Now if you don’t have spot metering on your camera, a center weighted average can do just just as well, but you will have to aim your camera’s center focus point to the proper area. And if you are using a point and shoot camera that has manual control but lacks capability to meter a small area, you will just have to get a general meter reading, then play around with the shutter speed.
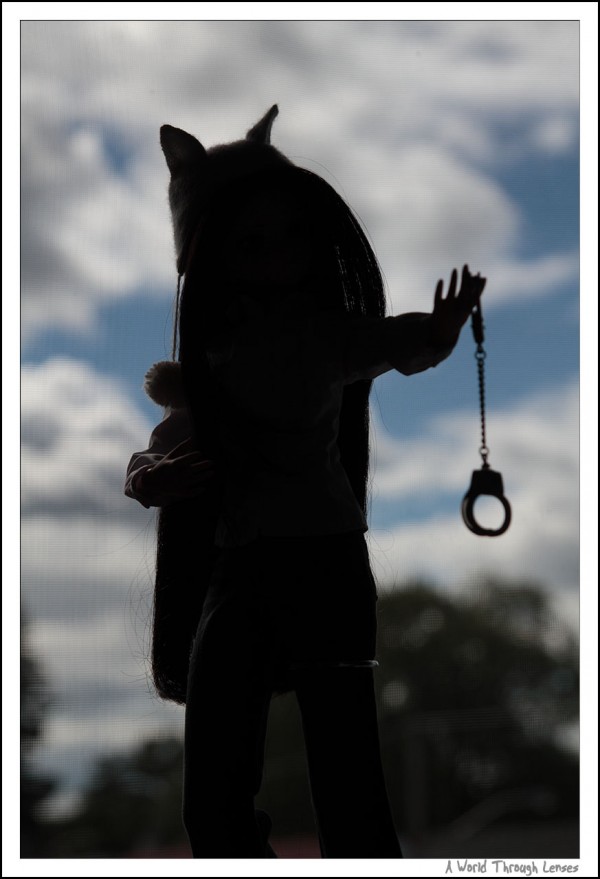
Now if I take a picture at the setting returned by the spot meter, it will properly expose for the sky. As you can see the sky is exposed properly — blue sky with lots of white clouds. You see some trees behind. Normally I would want to aim only at the sky. But because I am only shooting Rin from waist up, and her waist is right around the tree line, this is not a problem. What about my subject? Rin is nearly completely dark. This is actually good. Because it means that the Rin’s brightness difference against the sky is definitely very large. Now I can be sure that if I expose for the subject, my background will be blown out to be white. Incidentally, exposing for the sky is exactly how you can produce a silhouette photos. You might have already done so before purposefully or accidentally when shooting against the sun rise or sun set. Did you know that the same principle can be used for creating the white background.
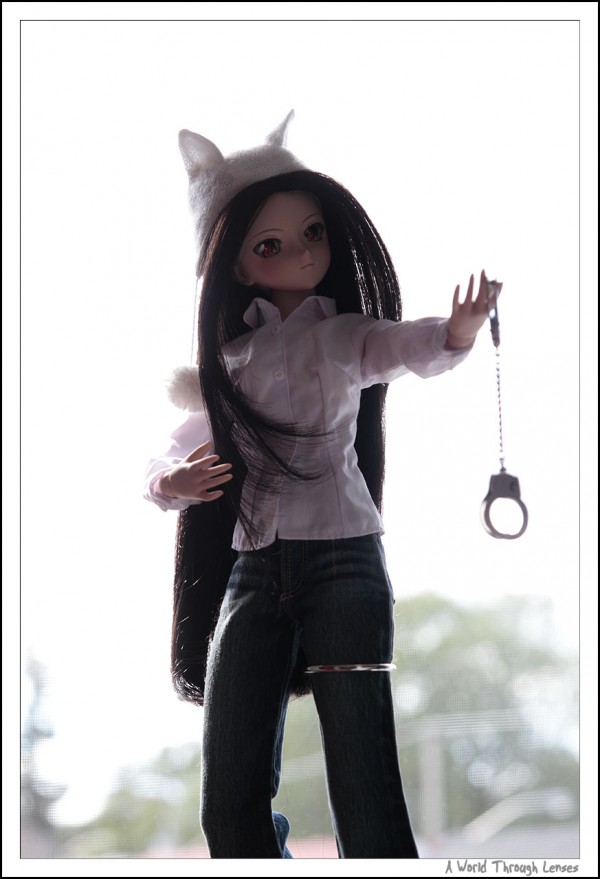
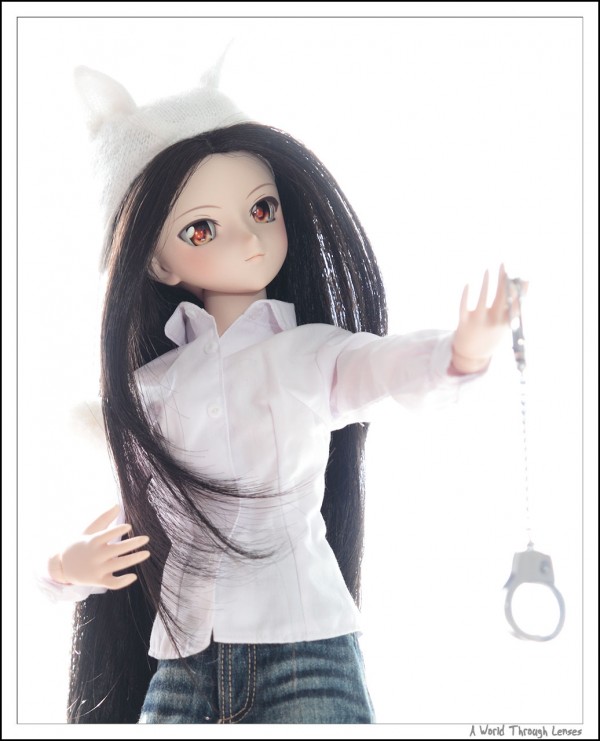
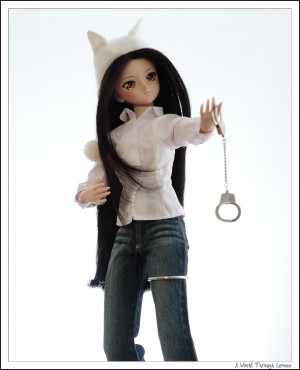
So again using spot metering, if I put the focus point right on Rin’s face, a 1/250 second at F4.0 is returned as the right exposure. I will set my camera to this setting and take a picture. As you can see, compared with my white frame around the photo the sky is pretty much 100% white. Rin’s a little dark, but I think the cloud just covered the sun a bit more than when I took the meter reading. But this does give me a references as to what settings I should be using under the current condition. Yes, by doing the opposite to a silhouette photo in metering, you can produce a white background against the sky.
A tip as well, a lot of cameras today, DSLR or point and shoot, supports the display of over exposure warning during playback. Typically they display the overexposed area as flashing white. And in most cases, overexposed means 100% white. So if you want to make sure you have a good white background, just look at the image playback with over exposure warning on and the flashing white area will tell you just how well your white background coverage is.
With the test completed, I set down to business to shot the actual photos. I shot a set of 3 with different exposure settings: 1/250 second, 1/125 second, and 1/60 second, all at F4 and ISO 200.Keep in mind this is setting for my setup under my current lighting conditions. You have to use the setting that’s right for your shooting environment, so make sure of all those on board metering capabilities.
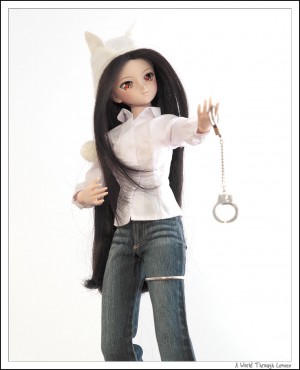
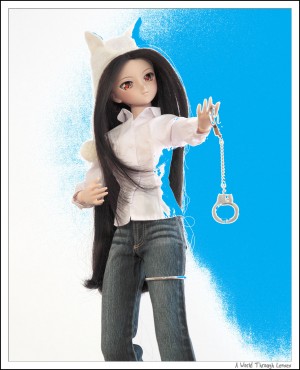
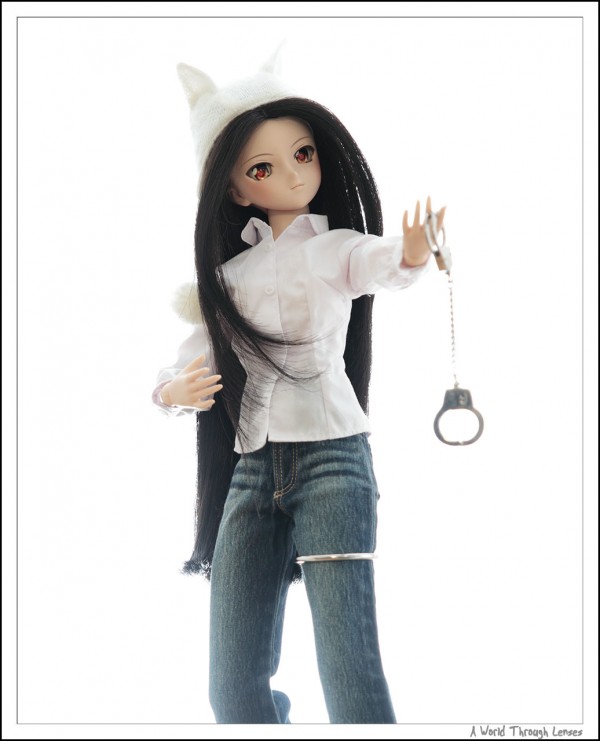
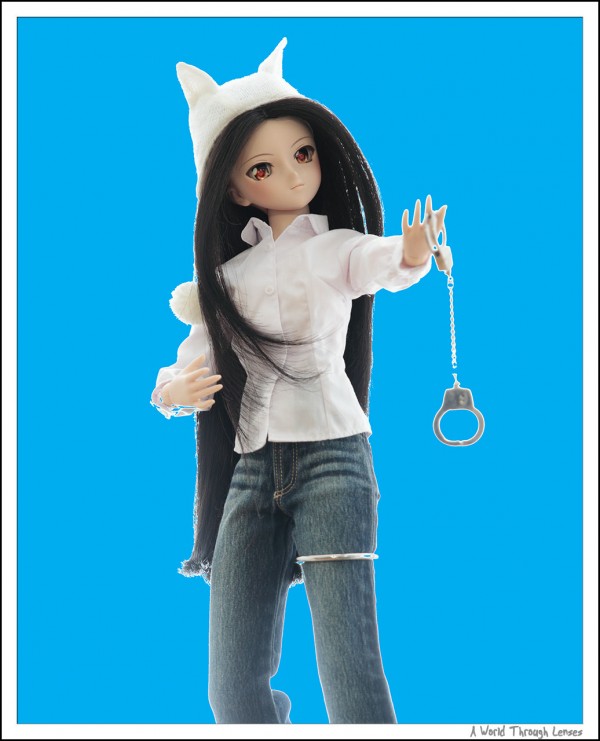
First one is shot at 1/250 second shutter speed. To the left is the actual photo. It’s a tad darker than I would have liked. And because it is hard to differentiate 100% white to other bright colours on the gray scale, I edited the image and replaced all RGB colour 255, 255, 255 with cyan. This way, you can visibly see just how much area in the photo is actually 100% white. With this setting there’s actually a little area on the bottom that’s not 100% white. I think that’s from the tree lines. All the photos below will have the same 100% white coverage done just so you can see how much of the background is 100% white.
The one below is shot at 1/60 second shutter speed. This setting results a bit too bright. It’s fine if you want to have a dreamy overblown effect. But to me the handcuffs and the cat ears on the knitted cap are all 100% white and too much details are lost in the light. Keep in mind, 100% white is always flat and can contain no details. Looking at the cyan coloured 100% white coverage photo confirmed my suspicion. In fact I choose Rin in this outfit for a reason. For a proper white background, her white knitted cap and her white shirt needs to contain detail instead of just simply blown out to white. So this setting doesn’t work for me.
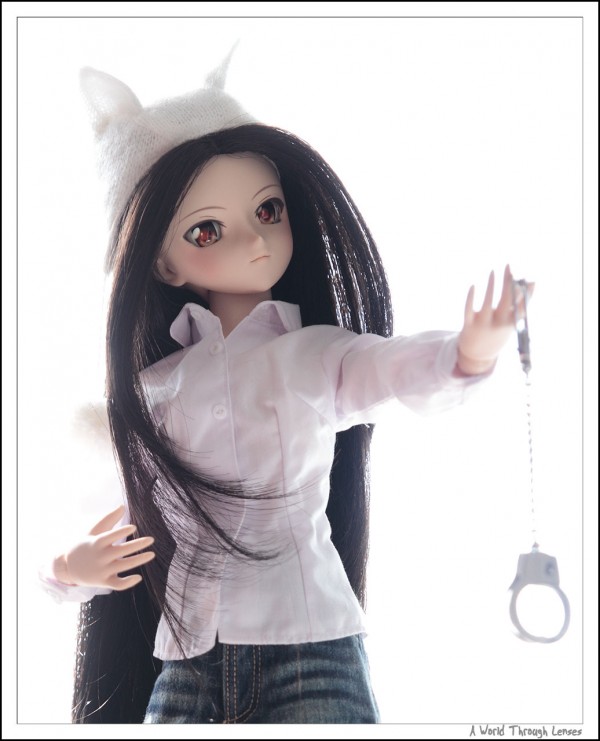
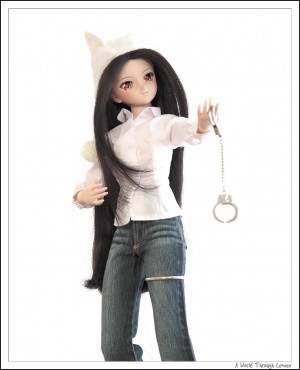
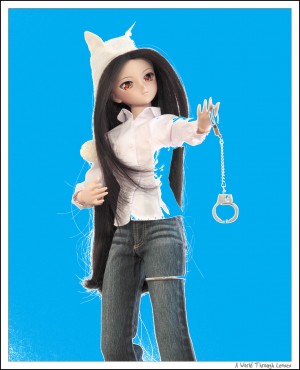
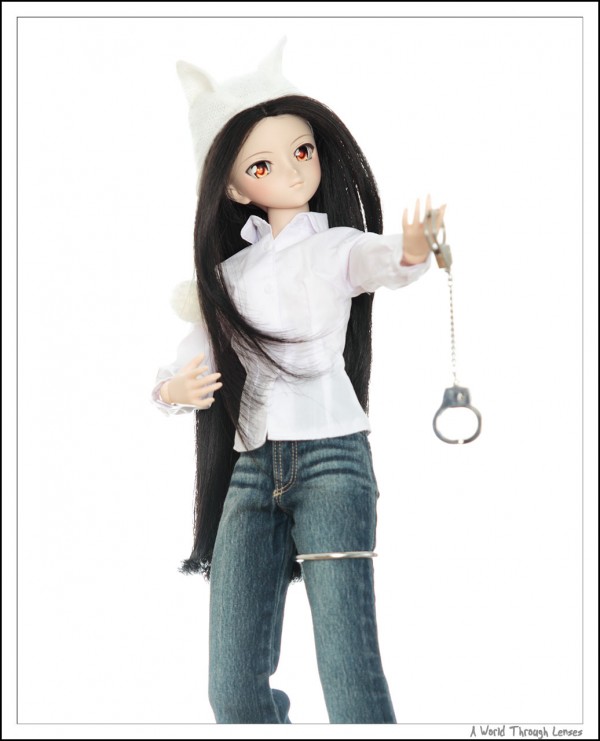
That leaves the 1/125 second result which I think is the best out of the three. It’s just bright enough to make the background all white, yet Rin is well exposed. And best of all, it is not too over exposed so that details are all lost.
Here’s the 100% white coverage map. As you can see the cat ears on the knitted cap still contains details. Her white shirt are not blown out either. The only area that is blown out was her right arm. That is because despite I’m shooting indoors, her right arm ended up right under the sun. I can’t really move her to a position where I can get a good angle towards the sky yet the sun will not shine on her. So this is a compromise I have to make. This also drives me to find alternative solutions so that I will not be depended and limited by the sun which I can neither impact nor change.
As you can see white background is pretty easy to achieve. In fact, it requires no additional equipment other than your camera, a bit of knowledge on exposures, and some experimentation to obtain some really good results. Just like the black background, it doesn’t involve any white backdrop material, instead it involves having a massive amount of light coming towards the camera as the background. It doesn’t matter what color is behind your subject, in this case a nice blue sky with clouds is what produced my white background. As the light overwhelms your camera’s dynamic range, the result is 100% white. You can stop reading now, or continue reading to see how additional equipment(s) can help making it even better.
1a – Use the sky as the background plus a flash for the subject
One of the problem with the shots above is that even though properly exposed, Rin’s face is still kind of dark. That’s because the sky is so bright that if I set the camera up for a good exposure on the face, the details will all be lost. The 1/60 second exposure above has a nice bright well exposed face, but unfortunately too much details are lost else where when they are blown out to white. So to help that, I added a flash (I’m using an old Canon 550 EX) in front of the subject. The flash is setup to fire manually at 1/128th output power, just a little bit to brighten Rin’s face. The flash output power setting is depended on the flash you use and the distance to the subject, so you will have to adjust based on your actual setup. So here’s the same 3 shots but this time with flash.
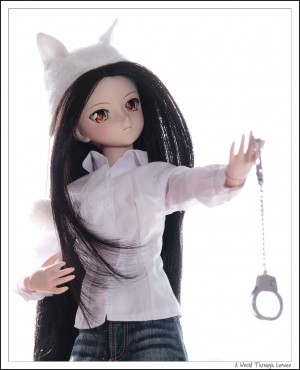
This is 1/250 second shutter speed with flash. Face is much brighter now. In fact it looked a bit like the result from 1/125 second shutter speed without the flash but this one has more details. So clear a flash is already a win over just using the sky alone.
At 1/60 shutter speed with flash it was the same dreamy overblown result. But the flash brightened the face more and also added catch light to the eyes.
And here’s the result form 1/125 second shutter speed with flash. Not only the face is better exposed, the white shirt is better exposed as well. Flash also added a little catch light in her eyes.
The 100% white coverage is good. There are some small area of her white shirt that was blown out to white by the flash, but it’s acceptable.
With a single flash, the white background against the sky was improved by allowing me to control how bright the face and generally the front of your subject needs to be regardless of how bright the background sky is. So even when the environment is not casting enough light to the front of the subject, one can still get a properly exposed subject with a white background. As a bonus when photographing dolls or people, the flash gives a catch light in their eyes that makes the photo looks a bit more lively. Now if you are doing this outdoors, you can use reflectors to shine the front of your subject in stead of using a flash. If you are doing this indoors like me, then a flash is needed. Some might ask, can I use a hot light or a lamp if I’m doing it indoors? My answer is that a lamp will be most likely not bright enough to brighten your subject significantly giving how bright the sky is.
2 – Use the flash for the background
As good as a bright sky is, free to use and produces good white background, there are some problems. First of all, a nice bright sky is not always available, may it be weather, the time of day you are doing your shooting, or the location where you are doing your shooting. Then there’s the problem of control, you cannot really control how bright the sky is or where the sun light will shine on (or in my case not shine on). A piece of cloud moving across the sun will mess up the meter readings and requires you to either wait for the cloud to pass or adjust for the cloud covered conditions. And that becomes frustrating when you are shooting on a day like today — windy and cloud are moving pretty fast produce quick light changing periods. I have some experience shooting under these kind of conditions, but I can just see how frustrated one will be when you are depended on the consistency of the light coming form the sky. So how can one go about producing white background reliably and consistently?
Here’s one way that one can use to produce white backgrounds. You will need a backdrop to reflect light back to the camera, a wall will do, and you will need one flash. You will also need a long cable that can fire the flash from some distance away. So first you will put your subject some distance away from your backdrop. You don’t want the subject to be too close to the backdrop, but not too far either. If you have a white, or very light coloured wall, then use that. If not, then some backdrop material must be used, may it be fabric, vinyl or paper. The backdrop doesn’t have to be white. Remember, we are aiming to blown out the background and any colour when blown out is white. However, coloured backdrop might cast unwanted colours onto your subject, and darker coloured backdrop doesn’t reflect light well. So in reality a white or very light coloured backdrop works the best. In my case, I just used a thin section of white wall in my house.
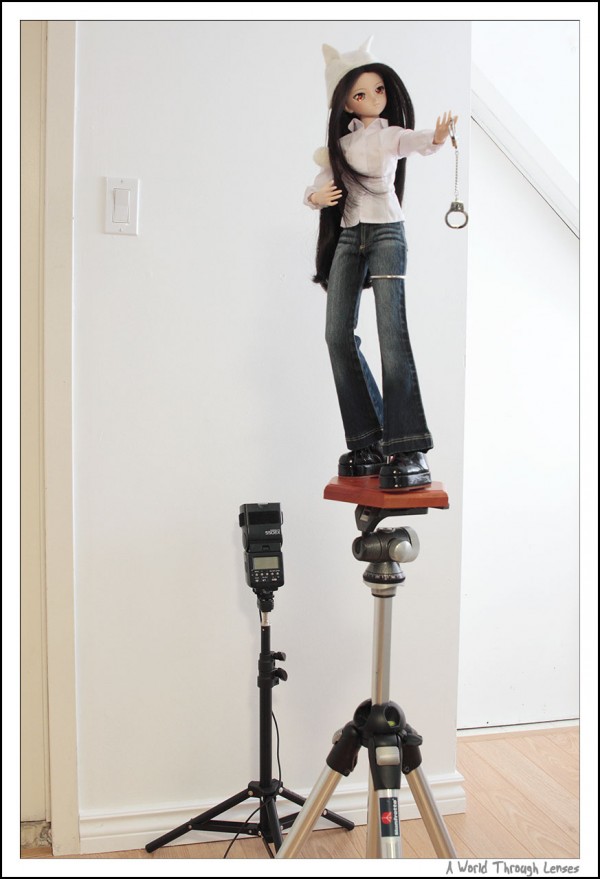
Then, you will place the flash right behind your subject, aiming upwards, tilted slightly towards the backdrop. The aim is to cast the light from your flash right onto the backdrop large enough to frame your subject in. The bright light of the flash will be reflected by the backdrop towards your camera and that is what’s creating your white background. So in a sense, we are trying to produce the bright sky indoors and consistently. So here’s how I setup this photo shoot session. Rin is standing on a doll stand supported by a tripod. I had my flash mounted on a Canon hotshoe with miniphone jack from Flash Zebra and then mounted on a background light stand. You don’t need to use the background light stand, I used to just put the flash on its own plastic stand sitting on some boxes. The Flash Zebra hotshoe allows me to trigger the flash using a standard PC sync cord. This is a much cheaper way to trigger a flash from a long distance. Under this setup, the flash can only be triggered in manual mode, but that’s all I need.
Now I setup the camera as if there’s no flash. I metered normally the way I would and set my camera to ISO 200, 1/8 second at F4.0. Here’s the result, keep in mind the flash was not turned on for this shot. As you can see, the white wall behind Rin is not really white, it’s in fact darker than her white shirt and her white knitted cap.
Now this is what you typically get for a photo in front of a white backdrop. Without a light to lit up the backdrop, the background will not be 100% white. Of course you can use image editing software to bring the background to 100% white. But there are problems with that approach. The following is the result of a level adjustment on the photo above to change the high input level from 255 to 205. The photo’s background looks white, but in fact are not 100% white. As see in the 100% white coverage map, in fact most of the background is still not at 100% white.
So now you have to adjust the high input level even lower to about 195 in order to achieve the 100% white background. But looking at the photo as well as the 100% white coverage map and you can see just how much details you have blown out to white. Large areas of the knitted cap and the white shirt have all been blown to white. This is not the ideal result, especially so since we are now in a controlled environment and not at the mercy of the weather conditions.
The trick to create a white background without need to use any post production or excessive over exposure to blown out details is to use a background light. The camera stays at the previous setting of ISO 200, 1/8 second at F4.0. But now the flash placed behind the subject aimed at the backdrop will be turned on. The flash is set in manual mode, and I will vary the flash output from 1/4 power all the way down to 1/32 power.
At 1/4 flash output, the amount of light reflected from the wall is too much. Just like the result at 1/60 second shutter speed in the use the sky as the background section, it has a dreamy overblown effect but not exactly what I’m after. However, take a look at the 100% white coverage map and you will see that it in fact is doing better than the result from level adjustments above. The white shirt did not blown out to white.
The 1/8 flash output produces the best result. The exposure is right on.
Looking at the 100% white coverage map and you can see a very nice clean white background coverage. Nothing is blown out to white. It is better than the result of 1/125 second shutter speed from the use the sky as the background section, because her arm is no longer blown out since there’s no sun light to contend with. The detail lost on the subject is minimal, yet the background is completely covered in 100% white. And this is the reason why we are doing this indoors in a controlled environment than in front of a window and be depended on the weather.
This is at 1/16 flash output. The amount of light from the flash reflected towards the camera by the wall is a bit low. If you look at the 100% white coverage map on the right, you can see that the corners are no longer 100% white. However, the result is still usable since the corners can be easily edited back to white with minimal effort.
This is the result of 1/32 flash output. The amount of light reflected by the wall is clearly not enough. Looking at the 100% white coverage map, you can see that the subject is no longer surrounded by 100% white. This one is not usable if you want the subject to be surrounded by a 100% white background.
2a – Use the flash for the background plus another flash for the subject
Just like the use the sky as the background section, by using a single flash on the background, the subject looks a bit dark. That’s because all that light came from the background yet not much light is shining on the front of the subject. If you have a wall right behind you, it can reflect some light back to the subject. However, in my case, I’m in a long room and the back wall is some distance away. So Rin’s face looks a bit dark. Now you can use reflectors trying to reflect some of the light from the background back to the front of your subject. But it’s much easier if you have another flash, or in my case a studio strobe that I can fire it right in front of the subject.
So here you can see the result of two flashes. One is the background light setup just like in the use the flash for the background section. The other is the studio strobe as an optical slave which is setup right in front of the subject behind the camera pointing at Rin. So just like when we added a flash when using the sky as the background, Rin’s face, or the front in general, is now lit up well, better than when there’s only one light for the background.
Looking at the 100% white coverage map. Again it’s a perfect coverage just like when use used a single flash for the background. But this time the face and in general the subject is much better lit. Yet no additional area is blown out to white.
The technique presented here is universal and scalable upwards or downwards. I demonstrated using a doll, but it can can be used equally well for figures such as this Hijikata Toushirou PVC figure.
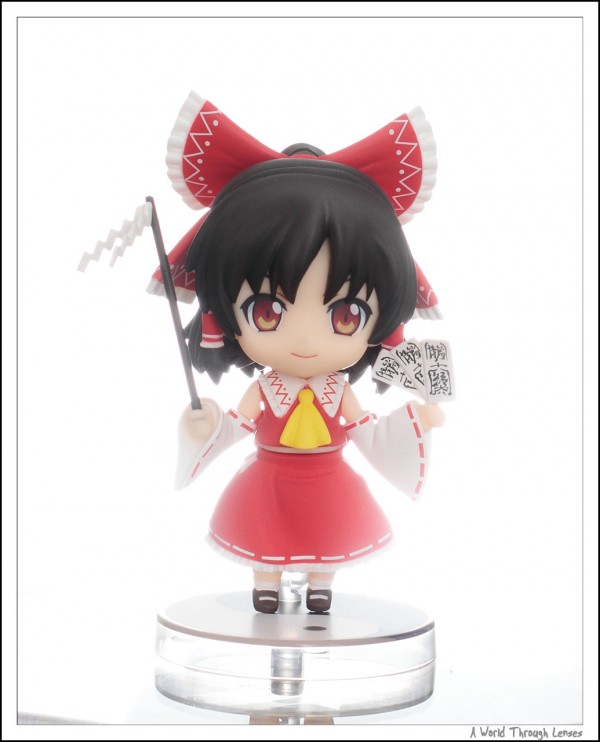
And it can also be used on really small figures like this Hakurei Reimu nendoroid. The same settings used for the doll is used on these two figures.
Keep in mind that if you are shooting real person, the same technique still applies. You just need to scale up the light coverages accordingly.
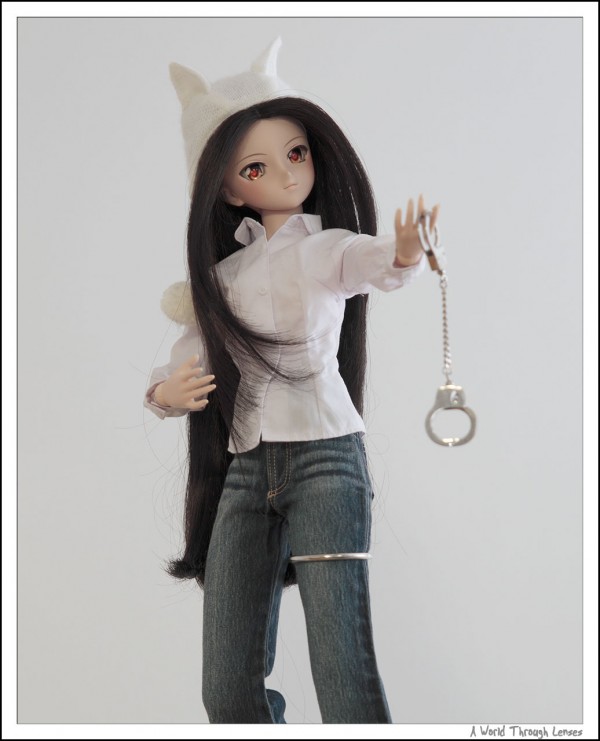
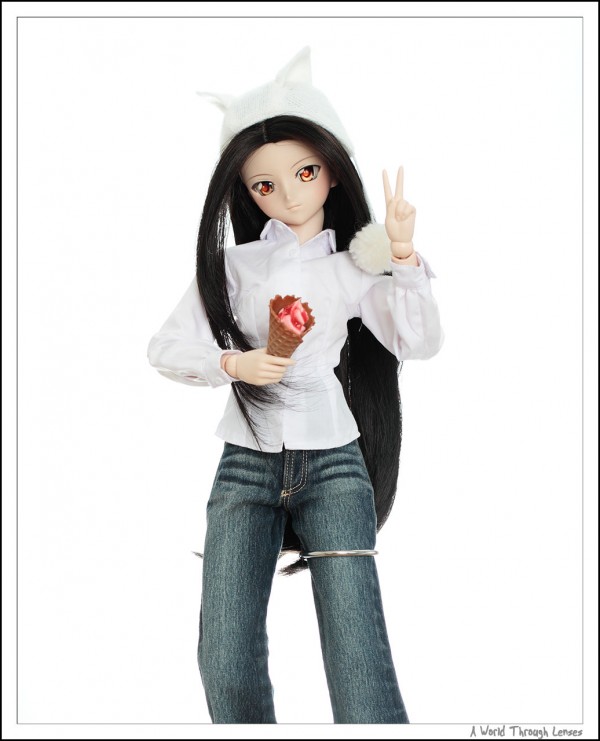
If you read all the way down here, you probably are bored of seeing the same pose by Rin over and over again in all these different photos. So I will end this tutorial with this photo of Rin in a different pose and of course with a white background. Hopefully you now have a better understanding of how to produce white background. The methods presented here is by far not the only way to achieve white background. I’m only presenting typical methods that allow an large amount of light coming from the background towards the camera which results in a white background. I’m sure with these basic understanding in mind, you can find your own way of achieve the same result using entirely different setups.
Happy shooting and maybe we’ll see you again in another installment of figure/doll photography 121.













Great article !
BEUTIFUL GIRL SHE IS FAMILY KANU IKKIOTUSEN
I like your detai-oriented article. And hope to read this kind of tutorials more in the near future.